DRM – Unreal Engine Integration
Document Revision: 4th March 2020
1. Install the VaRest UE4 Plugin – https://www.unrealengine.com/marketplace/en-US/product/varest-plugin
2. Load your project > go to “Edit” from the top menus > Plugins > Activate the VaRest plugin for your project and restart UE4
3. Download the two UE4 functions that you’ll need – https://svr.li/producer/ue4/functions and extract them under the Source folder of your project. Optionally, you can create new cpp files through UE4 and paste the code.
4. Create a new Blueprint:
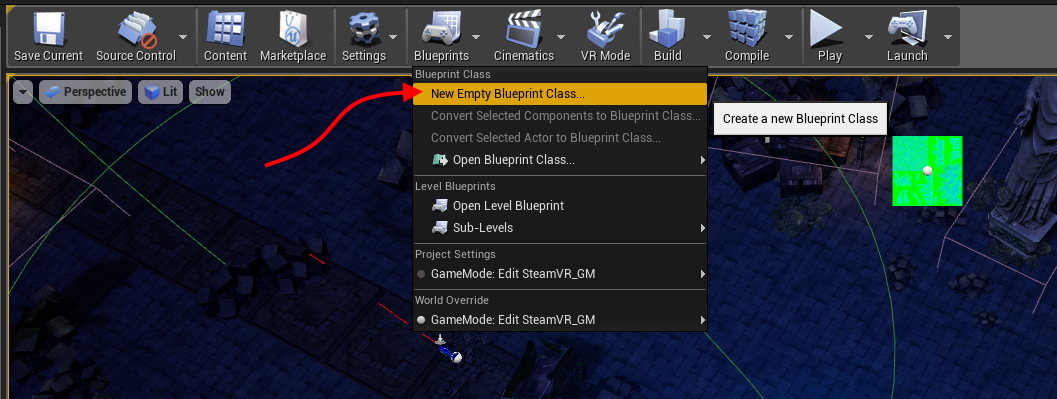
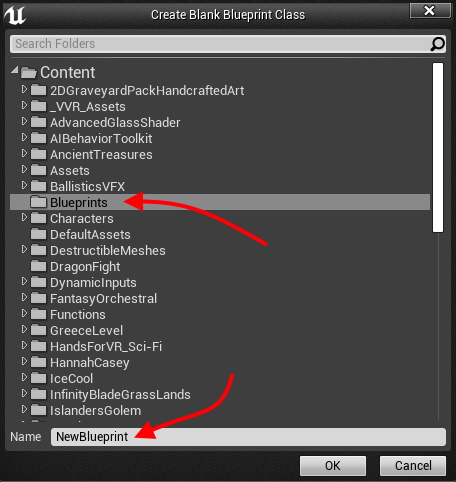
5. Select the first option (Actor) and then select the “Blueprints” category and give it a name.
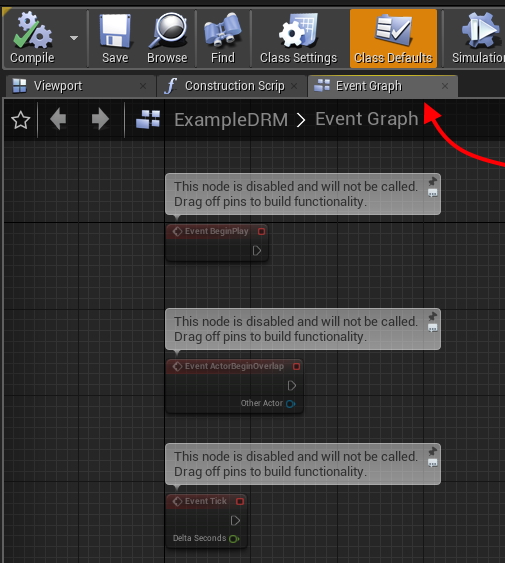
6. Edit the newly created Blueprint and switch to the “Event Graph” view.
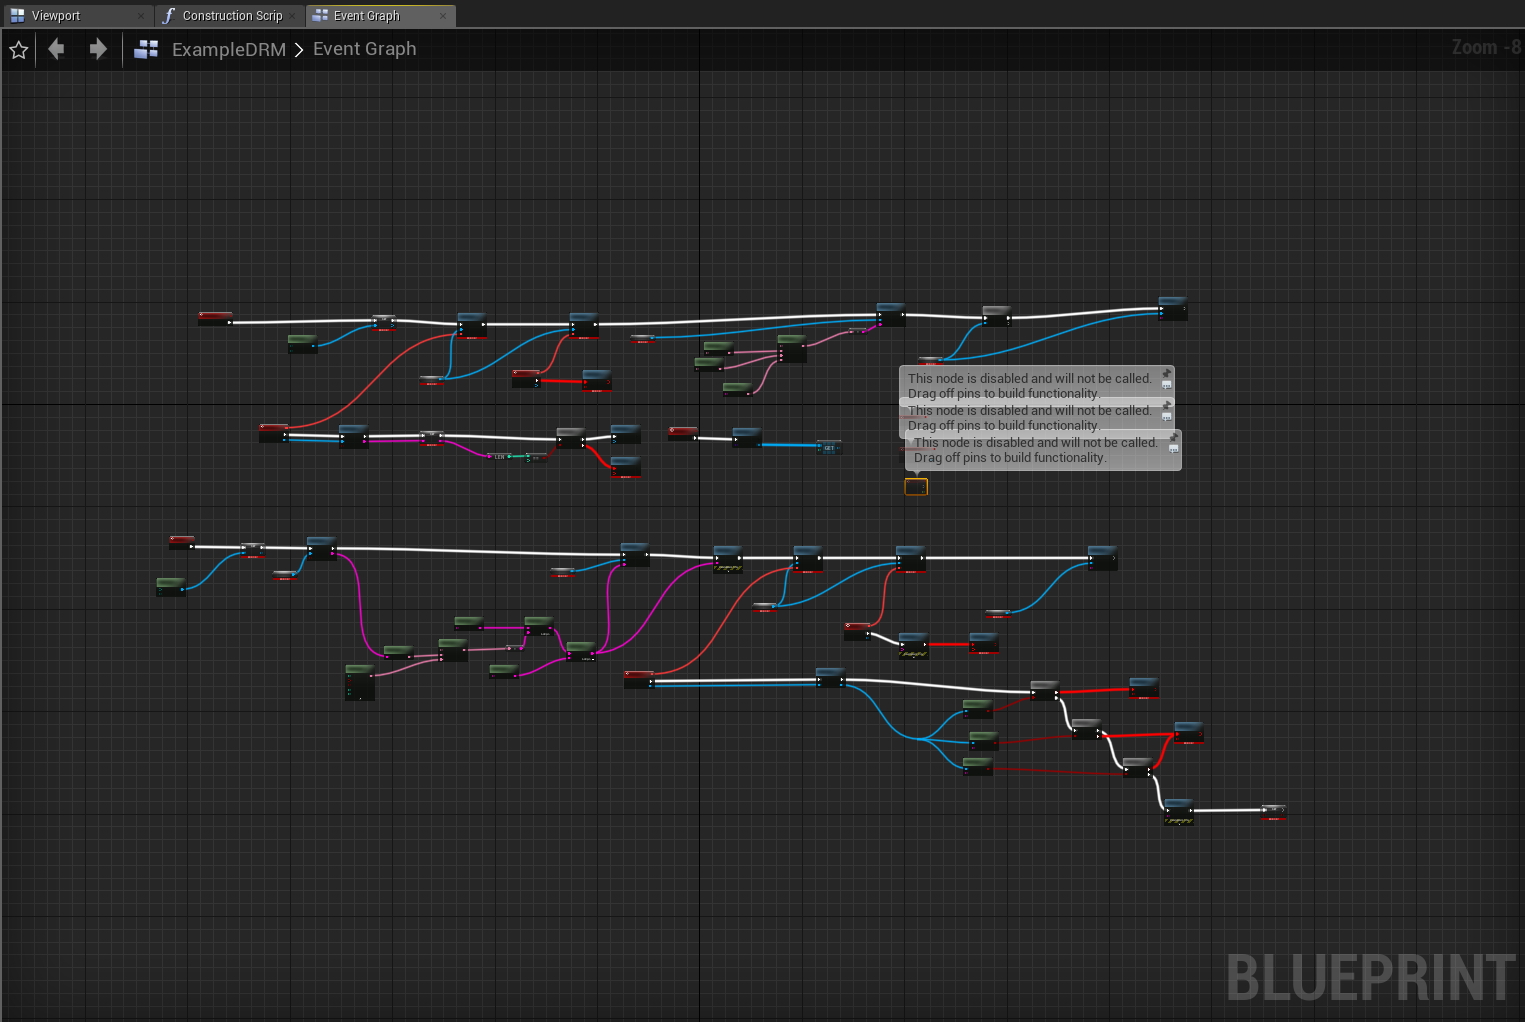
7. Copy the default Blueprint settings ( for UE4 version before 4.24: http://svr.li/producer/ue4/blueprint ; for 4.24 or newer: http://svr.li/producer/ue4/blueprint4.25 ) and paste (ctrl+v) under Event Graph. The Blueprint will look like this:
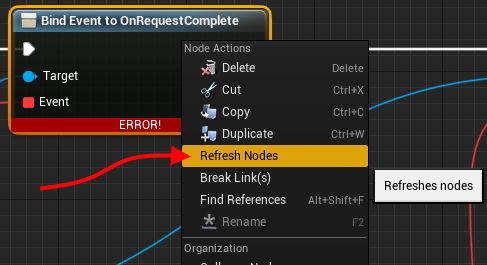
8. Attempt to “Compile” the Blueprint. This will produce multiple errors. Locate the errors, right mouse click on them and select the “Refresh Node option”:
If the context menu doesn’t offer the “Refresh Nodes” option, use the “Create variable” one instead:
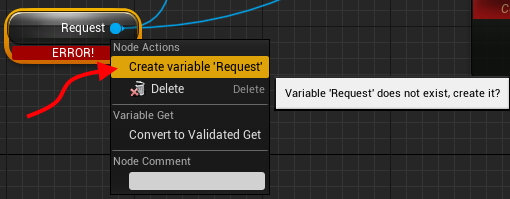
After creating a variable, use the “Refresh Nodes” option on the same node.
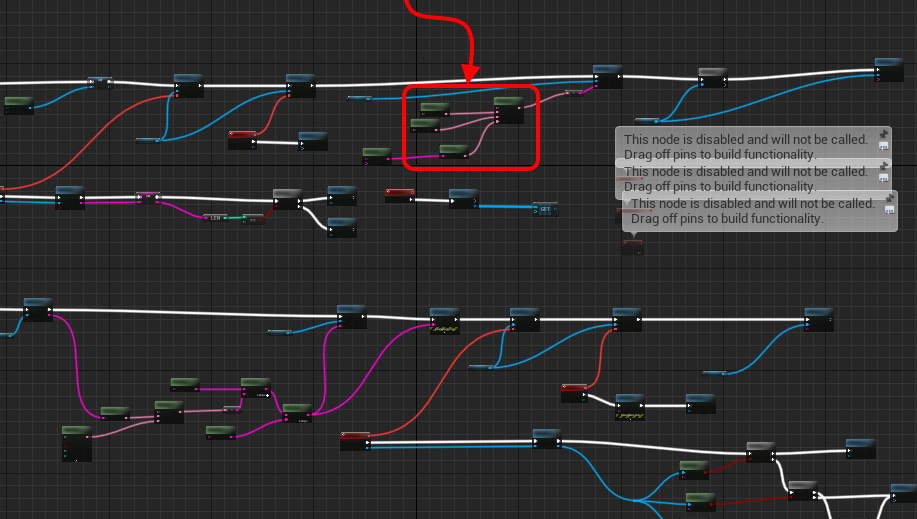
At this point, the Blueprint will compile successfully.
9. Zoom to the part that processes the registry:
And set the Game ID and the Key:
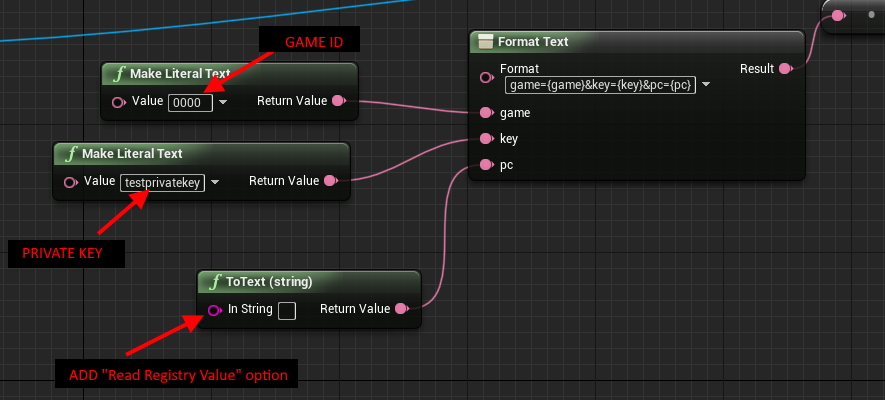
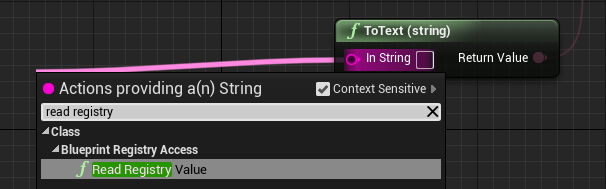
Link a “Read Registry Value” to the 3rd Node:
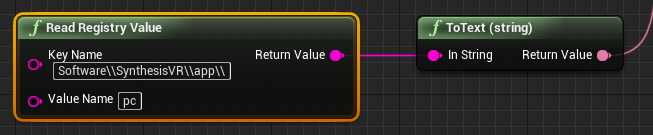
Set the Key Name to:
- Software\\SynthesisVR\\app\\
and set the Value Name to:
- pc
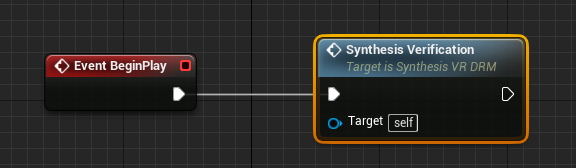
10. Locate your “BeginPlay” event and assign the “Synthesis Verification” functionality
You are ready to compile the Blueprint.
11. Ensure the newly created Blueprint is placed in your main level and compile your game build.
12. Upload the build on SynthesisVR CDN (link)