How Can We Help?
Preface: This is by no means a deep dive into OBS, this is a basic overview of the software and how you can integrate its usage with SynthesisVR using Command Calls. We will highlight the basics you will need to know to get going.
SynthesisVR has an integration with OBS allowing you to record and/or trigger a stream with OBS. This article introduces an alternative and possibly more granular usage using Command Calls as well as giving an overview of how to set up OBS. We hope you enjoy this ride ?.
First the OBS Stuff
You’ll need to install OBS first via https://obsproject.com/ and you’ll also need the VR Plugin is you are going to record the VR portion, you can find that here: https://github.com/baffler/OBS-OpenVR-Input-Plugin/releases
Once both are installed, you will want to be sure to set some basic settings for OBS. The first thing is to make sure your Profile, which is basically a “memory slot” of your settings. You can create a new Profile or duplicate an existing one. Name it something like “1080p Recording” or “VR Recording” or something indicating what the overall settings are going to be. Technically you would only need to do this once depending on what you may be recording, more on that later:
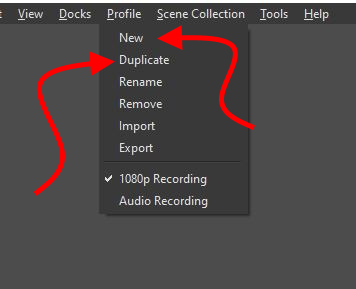
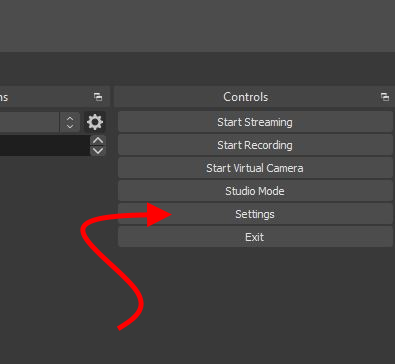
Once you are in this Profile, the next is to go into settings and we’ll discuss the primary things to edit:
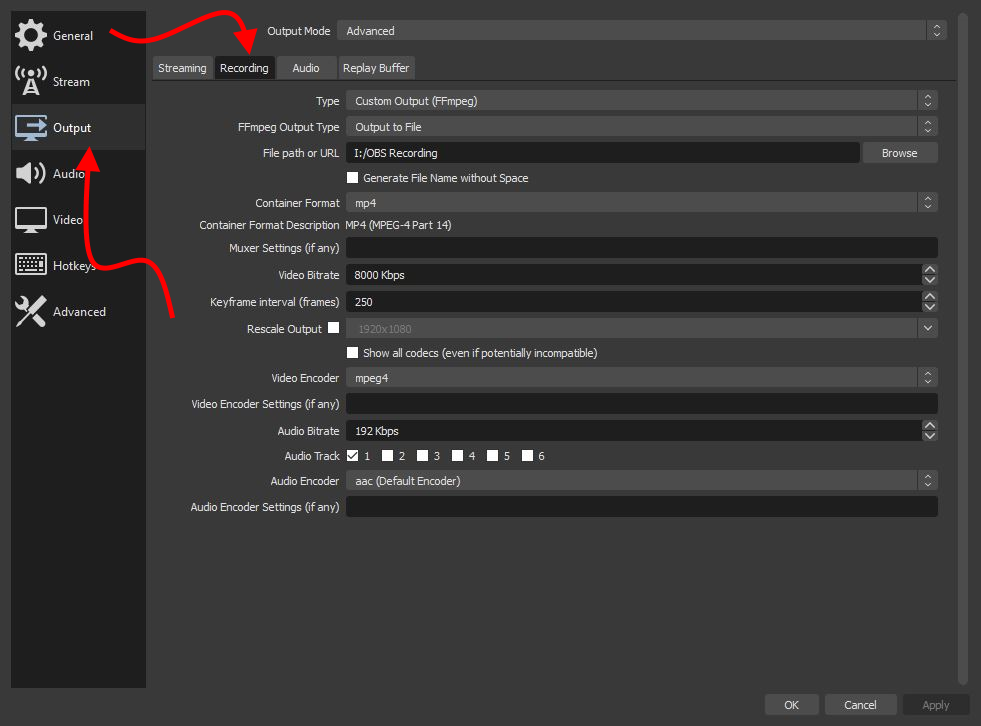
For recording locally, which is the primary goal of this guide, first head to Output and click on the Recording Tab. The following is probably the best options to set, the thing to play with would be the Video Bitrate which is usually defaulted at 2500 Kbps and should be sufficient, but a higher value means better quality with the sacrifice of additional storage space. Play around with that until you get the result you are happy with. Additionally you’ll want to pick a storage location that works for you.
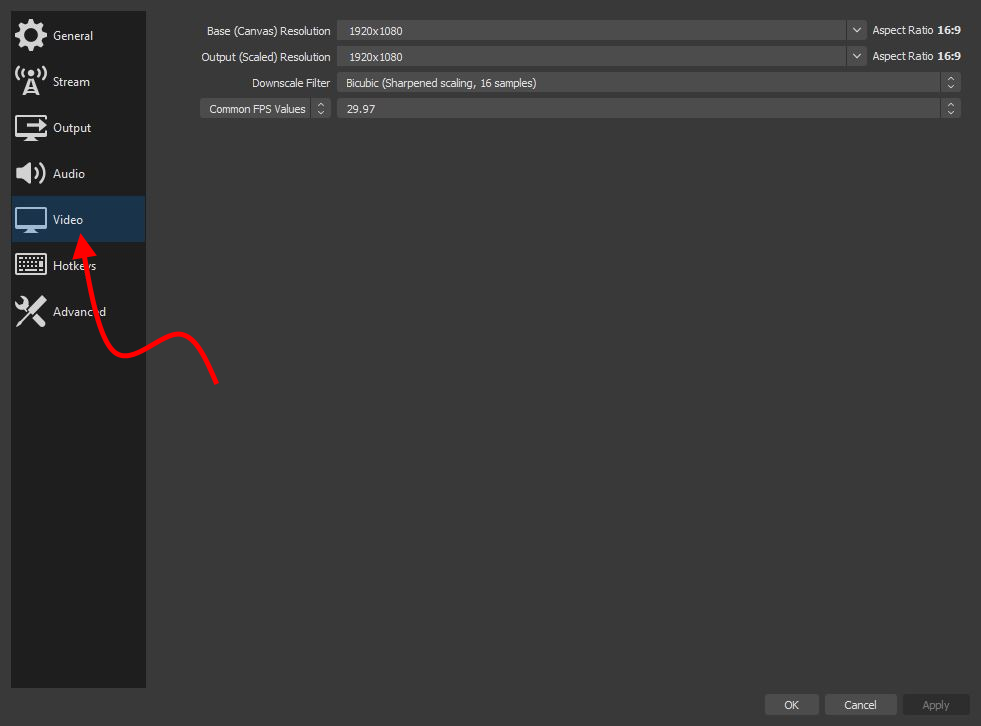
Next would be the Video Tab and you can set the proper capture and output resolutions along with the framerate. Generally speaking 30 or 29.97 frames per second is your best bet, but you could do something faster if you want to do some slow motion. But this isn’t an editing tutorial ?.
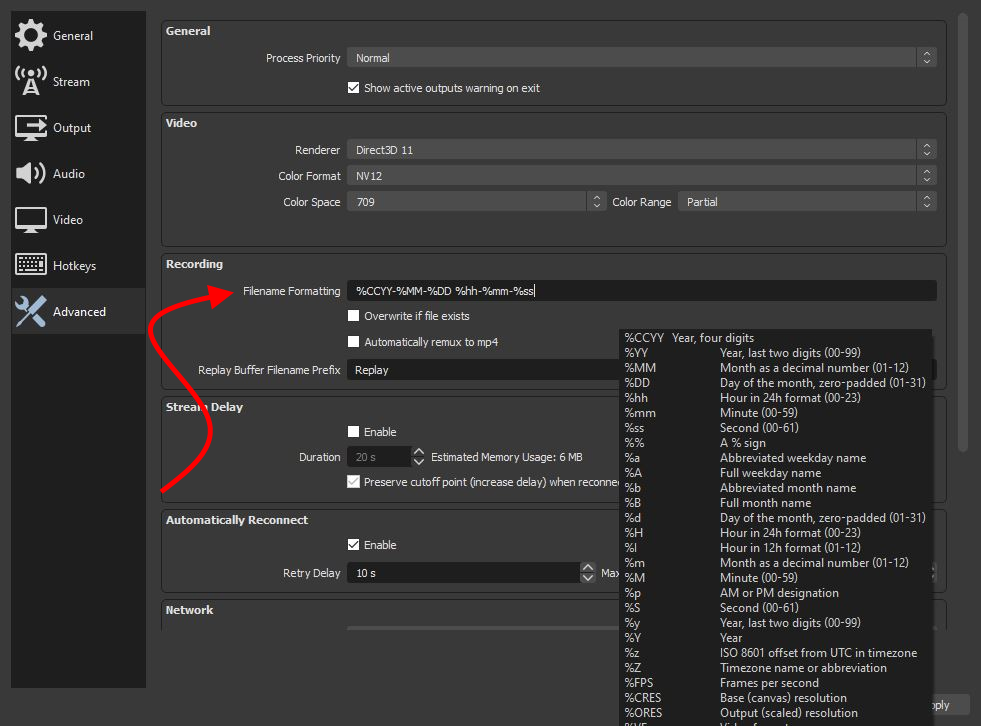
The last thing to set would be in the Advanced tab and it’s the Filename Formatting. This would be the reason to have different Profiles if you’re recording different things (like in VR and also an external camera or something) and would be useful if recording simultaneous recordings at once. More on that later. You’ll notice that on the screenshot there is a list of the % placeholders, feel free to use whatever combination you want.
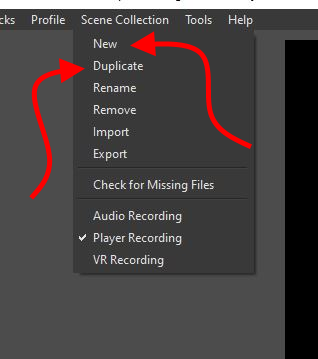
Once you’ve got your Profile settings done, click on OK and it’s time to build your scene. Scenes are what is being recorded including video and audio components. You have to first set up a Scene Collection and this is similar to the Profile setup. You can either create a new one or duplicate an existing one. Be sure to name it something memorable as you did the Profile, it can even share the same name if you want to keep things consistent.
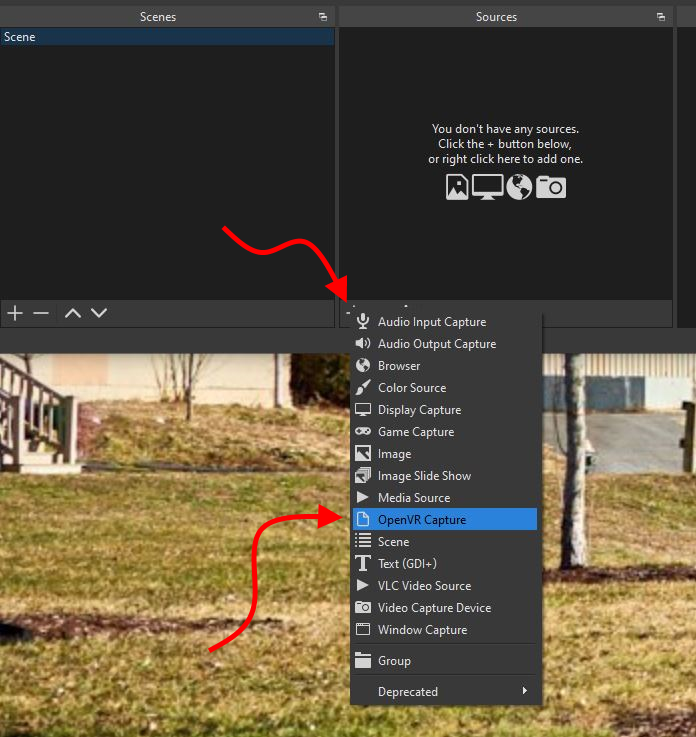
You can have multiple Scenes in a collection and each scene (and Profile, more later) can be triggered via a command line and by extension Command Calls. You will likely only need one Scene per Profile. You can leave the left side Scenes along and focus on the Sources box. To add a Source, click on the + at the bottom and choose a source. If you’re looking to capture VR, choose the Open VR Capture option:
For Audio Input/Output, the recommendation would be to choose the VR Headset Microphone for Input and the VR Headset Audio as the Output (vs any other options that might be presented to you). Be sure to name them appropriately to better identify them. When adding any video source to a Scene, be sure to adjust the size and position in the viewer at the top. When adding audio sources, be sure to adjust the levels in the audio mixer so the volume isn’t hitting the red a lot.
If you plan on doing simultaneous recordings of both inside and outside of the headset, the recommendation would be set up a different Profile (with its own Scene) with a different Filename Format so that there’s no chance of overwriting the file or strangeness with file naming issues.
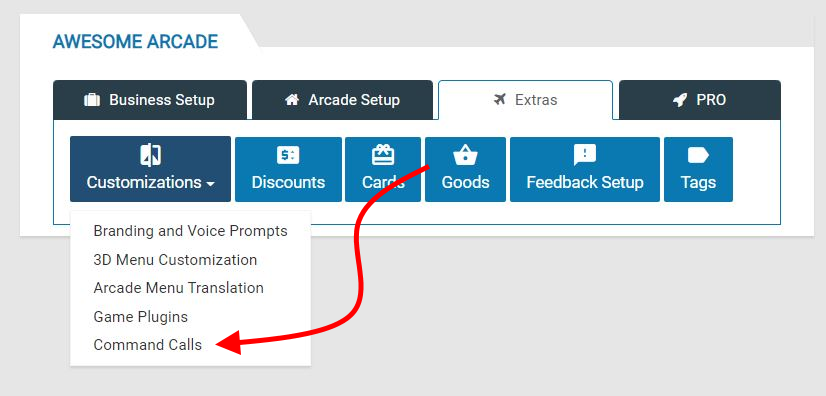
Once you have all your Profiles and Scenes set up the way you like them (be sure to do some test recordings to confirm OBS is saving things the way you want), you’re more or less done with the set up process of OBS and it’s now time to move onto the SynthesisVR portion. You will need the names of the Profile(s) and Scene Collection(s) you will be using. You’ll need to head to the Command Calls section:
And now the SynthesisVR Side
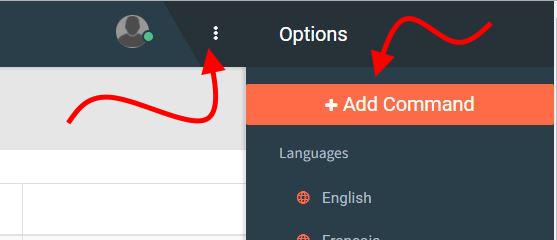
To create a new Command Call, click on the 3 dot menu and then choose +Add Command.
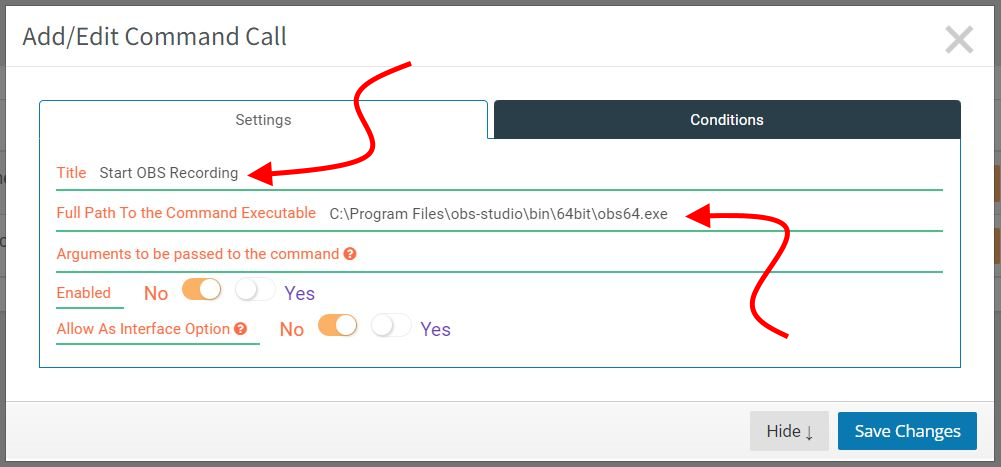
Enter in the title of your Command Call, probably something like Start OBS Recording and enter in the location of the OBS executable which is likely C:\Program Files\obs-studio\bin\64bit\obs64.exe
Next comes the fun part, the arguments. You can find the OBS Launch Parameters here: https://obsproject.com/wiki/Launch-Parameters and we’ll primarily focus on startrecording, minimize-to-tray, profile, and collection. The last 2 would not be necessary if you have only 1 Profile and Scene Collection. So if we called our Profile “1080p” and our Scene Collection “VR”, our Arguments would look like this:
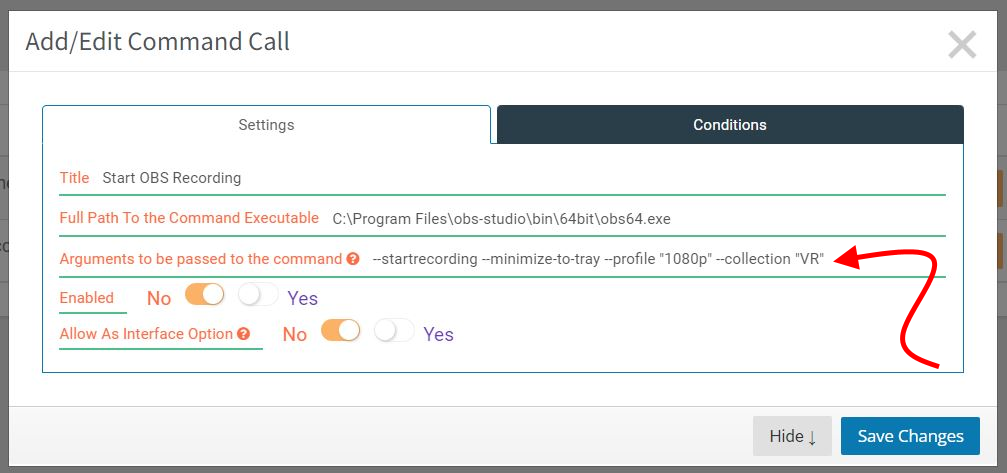
Note the double – before each parameter and the quotation marks around the Profile and Scene Collection names. The last step would be to make sure to Enable the Command Call and, if you want to trigger it from the Your Arcade page, enable the Allow As Interface Option. We will discuss the Conditions tab shortly, but if you now head to the Your Arcade Page and refresh the Stations via the Gear Icon, you can now trigger the recording be clicking on the Command Prompt button for all Stations:
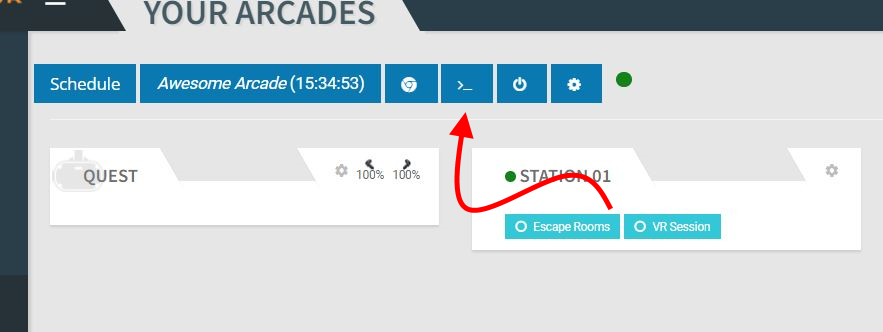
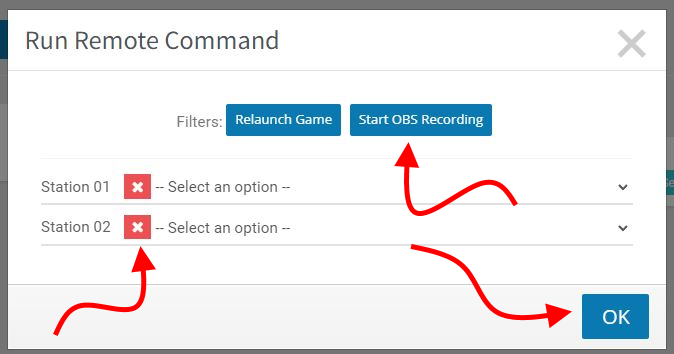
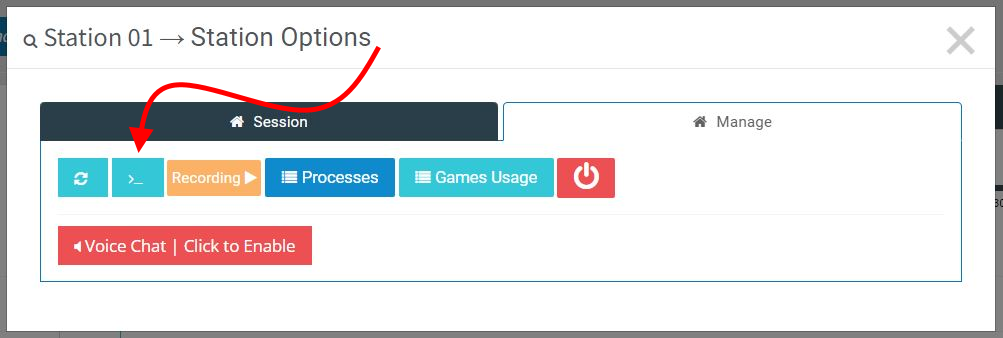
If you don’t want to record on a specific station, you can X that out with the big red X button before clicking on OK. Additionally you can launch a Command Call for one specific station by either clicking on the green bar on the left of the station name in the Timeline View or on the Station name or the gear icon in the Standard/Station View and then go to the Manage tab and clicking on the Command Call button:
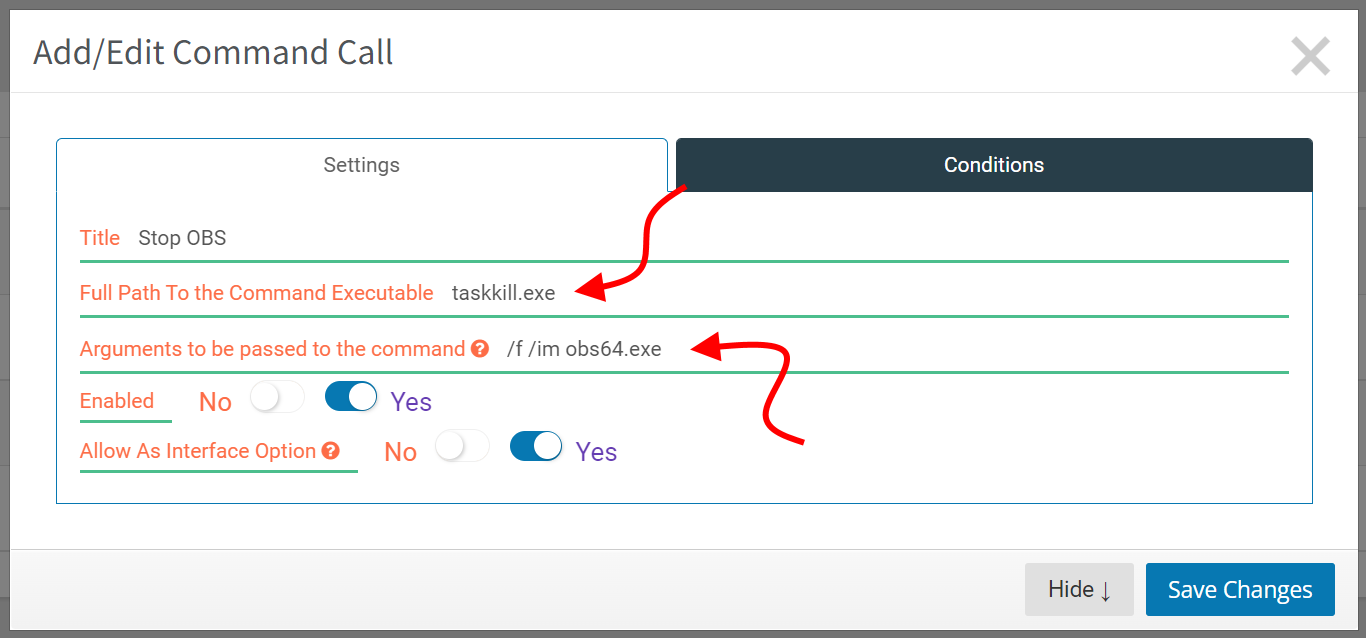
At this point, you’re probably wondering “but how do I stop OBS?”, which is a good question. In that case, you’ll want to create a Command Call that basically ends the OBS task using as in the image below:
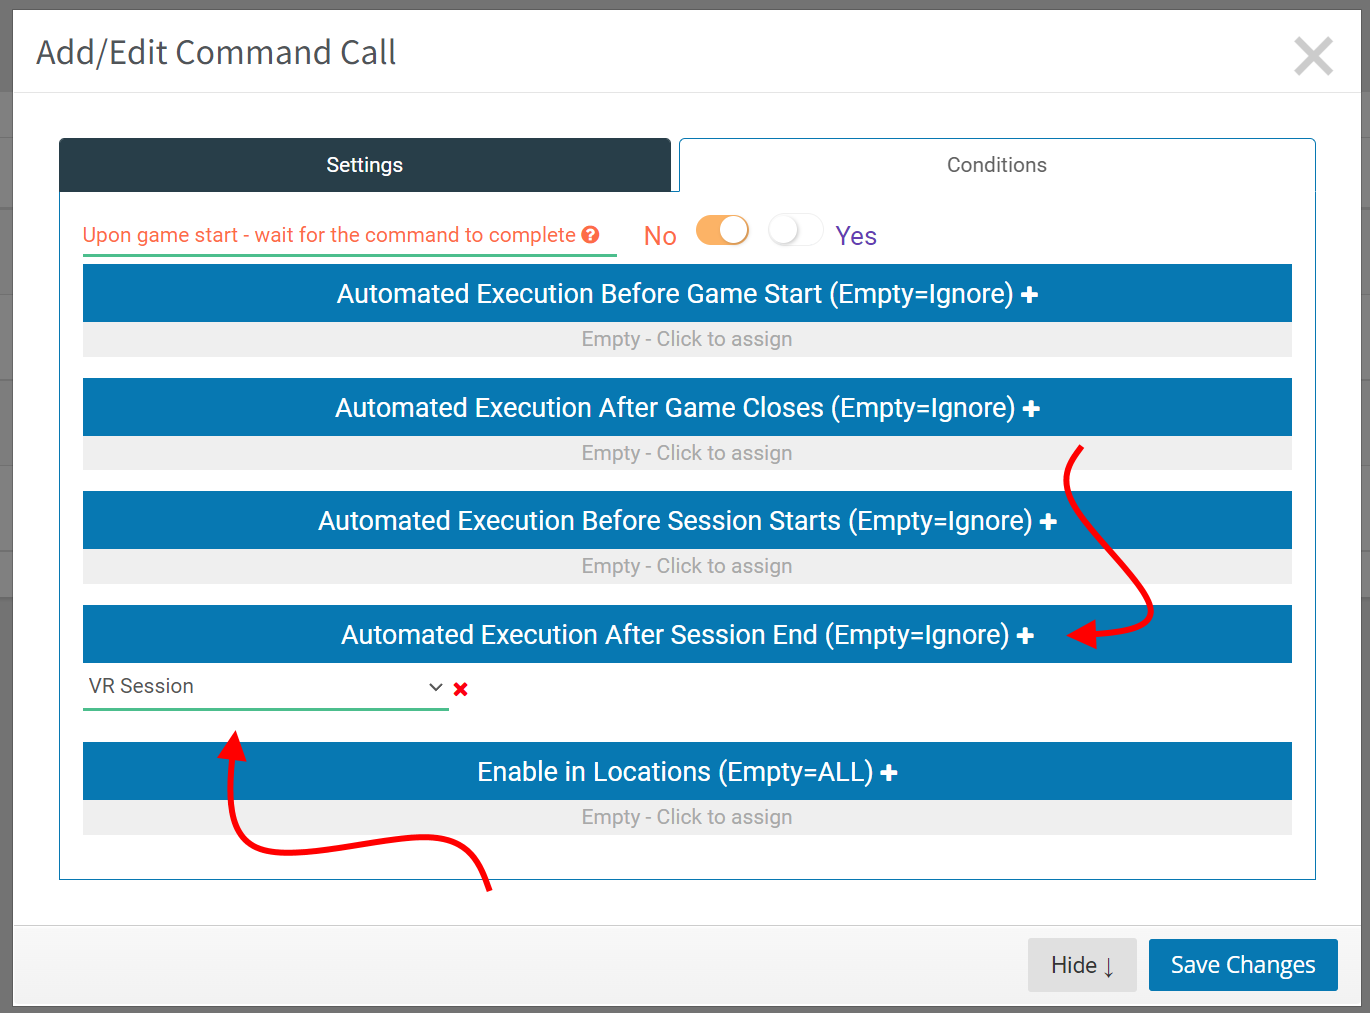
The last step of this process to automate the entire process is inside the “Conditions” tab of the Command Call. To start and end the recording at the beginning and end of the sessions, under the conditions you’d need to select the appropriate Experience Types you want to record. To start a recording at the beginning of a session, you will need to add each Experience Type by clicking on the Automated Execution Before Session Starts then use the drop down menu in the resulting field. Add as many or as few Experience Types as you want. This, of course, should be in the Command Call that starts the recording via OBS.
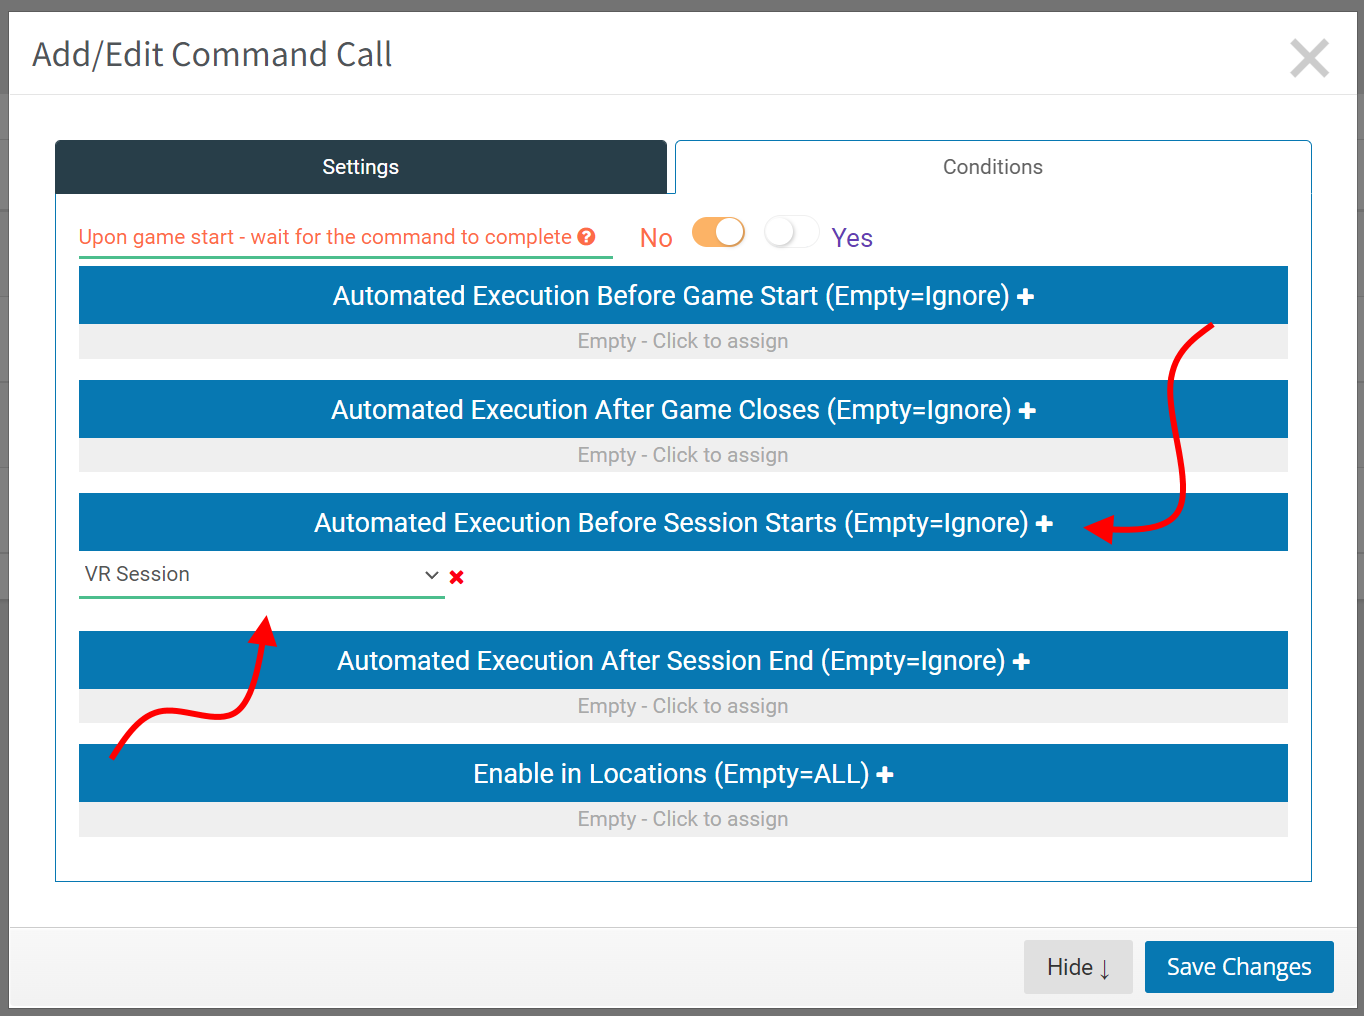
To have the OBS recording stop automatically at the end of a session, you would essentially do the same thing on the Command Call that stops OBS. Remember to have the same Experience Types set as you have for the recording start. In this case you’d use the Automated Execution After Session End section.
Of course, knowing the array of conditions above, you can see how deep you could make these automations, maybe only recording a specific game for specific sessions in specific arcades you own. This, of course, is not limited to OBS, but has a much wider usage than this one particular exercise.
Now that we’ve set this all up and if you followed the basics of the guide, you should have an automated recording of all sessions saved locally to the PC. You could also map a network drive to another PC and save to there, but that’s beyond the scope of this article.
One More Advanced Consideration
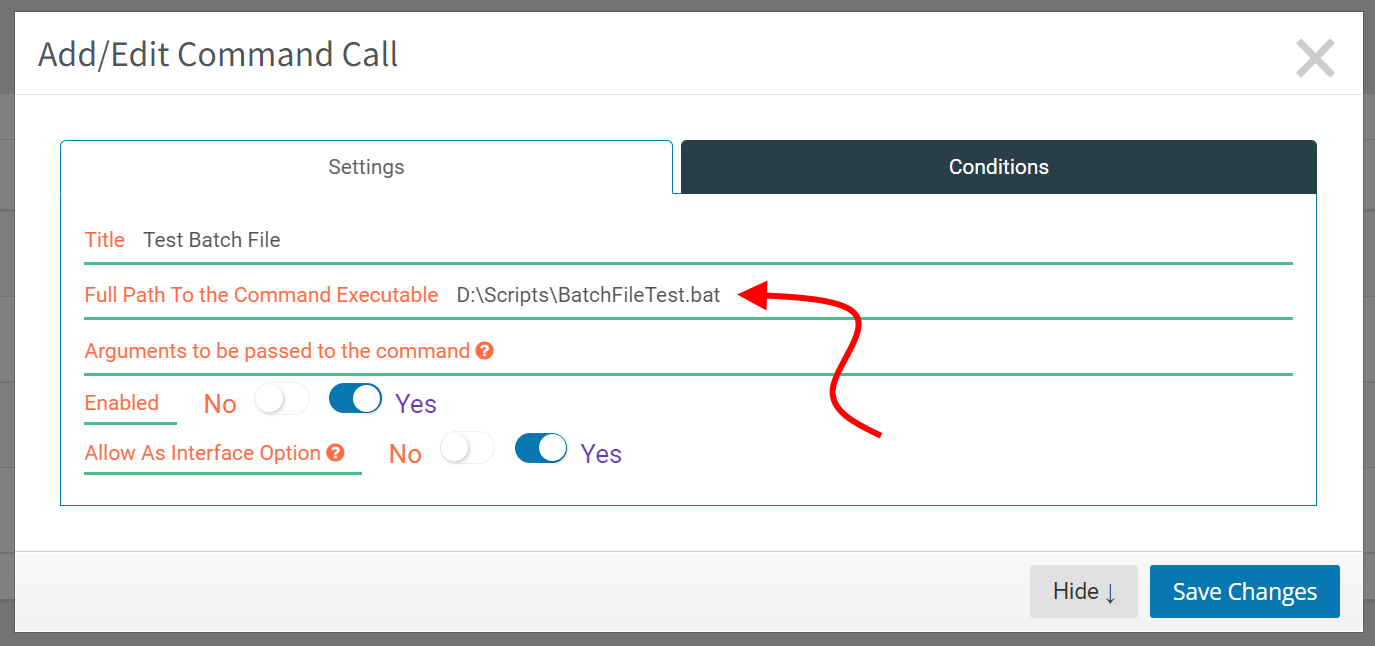
One of the most powerful parts of using Command Calls (and, by extension, using it with OBS) is being able to launch batch files (.bat). Batch files can contain multiple commands that can be triggered by one Command Call. In the case of triggering batch files, what you would need to do is to put in the path to the batch file in the Full Path To the Command Executable field:
But how does this help with OBS? Well the one thing most people may not be aware of is that you can record multiple OBS “streams” using different Scenes and/or Profiles. But to do so can be cumbersome using the OBS interface and can be done via a batch file. You probably know what’s coming… Please consider the following batch file:

Each START line triggers a different Profile (which controls recording size, format, location, naming, etc) and Scene/Collection (which controls what is actually being recorded). In the example above, the system is recording the VR portion in one file and the customer via a Webcam in another file. The timeout code is necessary as it pauses for that many seconds since starting both of these at the same time may not end up triggering both. 2 seconds may not be necessary, but seems like a safe amount.