How Can We Help?
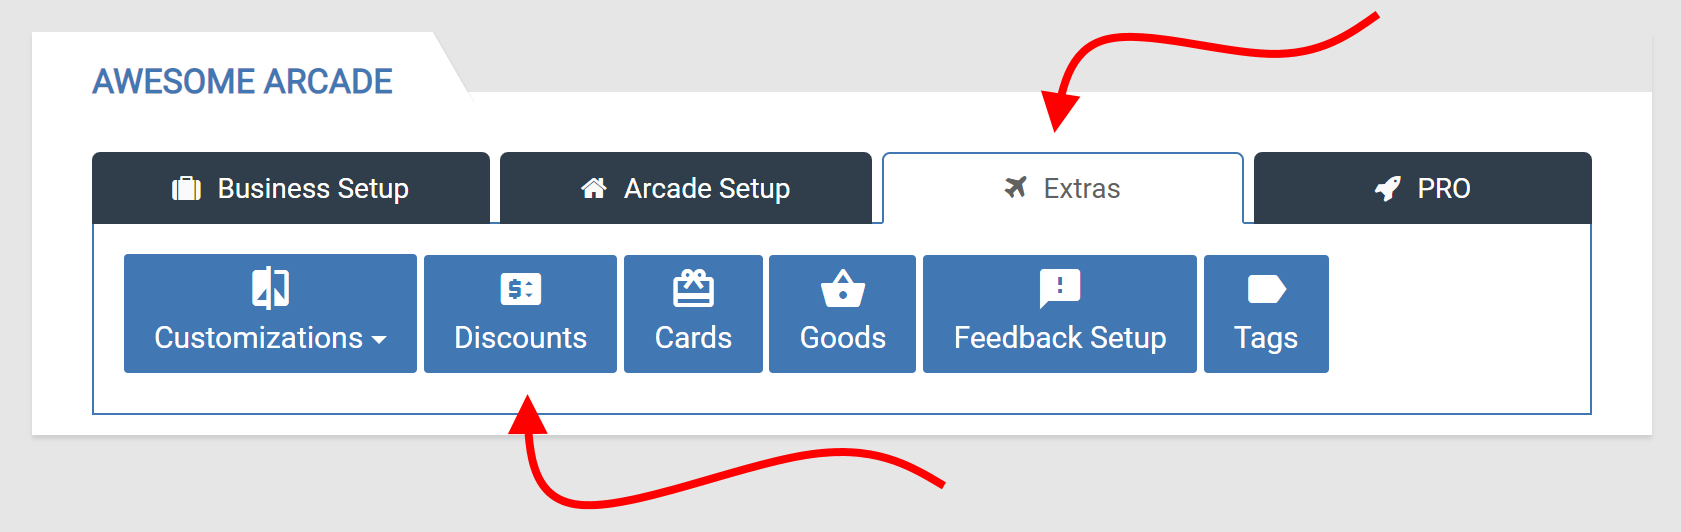
From the Administration section, head to Discounts under the Extras tab (note that this needs to be accessed from the Advanced view).
Creating Discounts
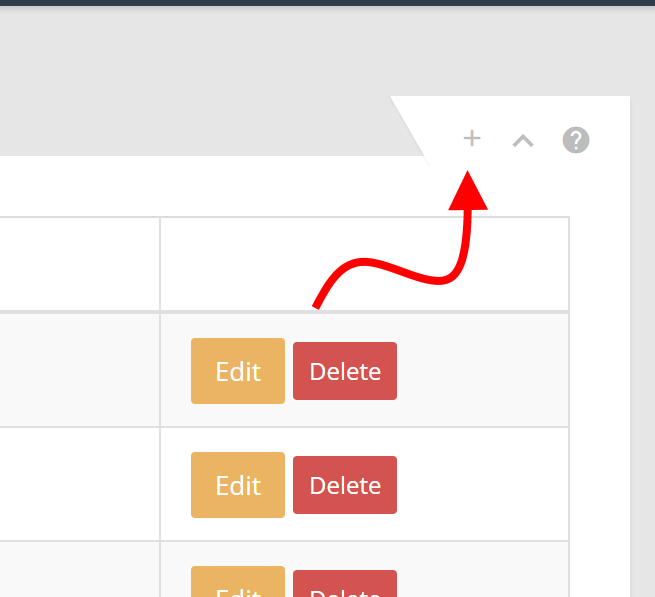
You can create a new Discount by clicking on the + button in the top right. You can also edit or delete an existing Discount from the buttons below that:
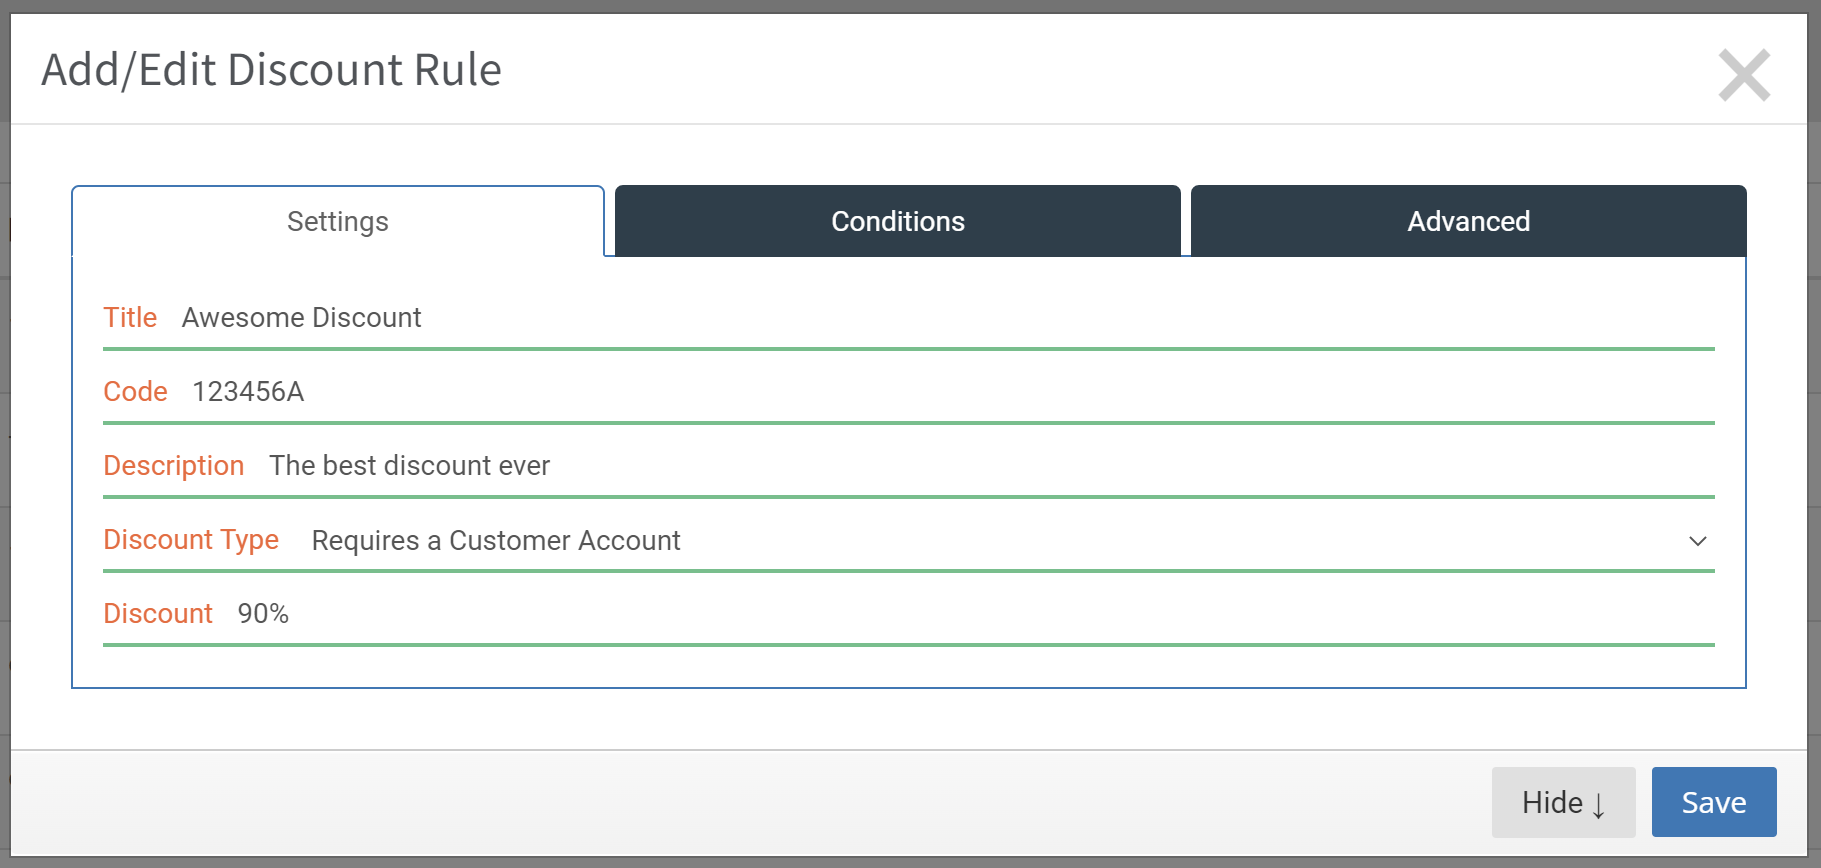
On the first “Settings” tab, you’ll need to enter the following information:
- Title: The name of this Discount. This is internal and the customer won’t see it
- Code: This is necessary, but in certain circumstances will not be necessary (see more below)
- Description: Again, this is internal and is meant to help you identify more details about the Discount
- Discount Type: More details below, but you will need to decide what and how this Discount will be used
- Discount: This is what the discount will be. If entered in with a $ as in $10, then it will deduct that amount, so in this case it would deduct $10. If you use a % as in 10%, then it will deduct a percentage, so in this case it would deduct 10%.
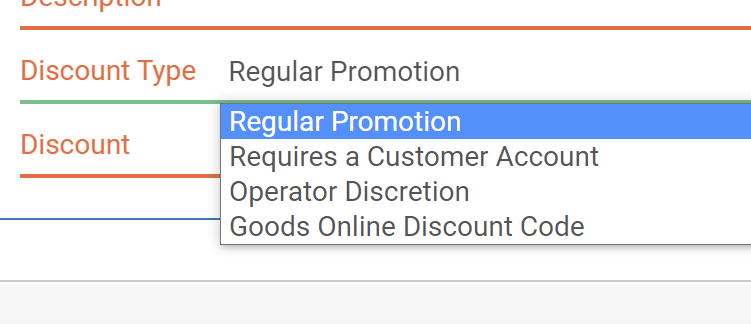
For the Discount Type, please note the following:
- Regular Promotion: This is the case when a code will not be necessary and will apply to Experience Types/Work Rules that it’s attached to (and if it matches the Conditions in the next tab)
- Requires a Customer Account: This would need a customer to set up an account before they can apply the discount. Additionally, this would require the Code to be entered
- Operator Discretion: This discount will need to be applied by the Operator at the time of booking
- Goods Online Discount Code: This would make the Discount applicable specifically for Goods. More information further down.
Next, we have the Conditions tab.
The first thing that you need to do is to assign the Discount to the specific Experience Type. Note that doing this only limits which Experience Types this Discount can be applied to. But Discounts still need to be attached to Work Rules. More below.
Next, you need to assign which arcades this Discount will apply to. If you only have one location, then you just need to choose that. If you have multiple locations, this will be where you might assign certain Discounts to certain locations.
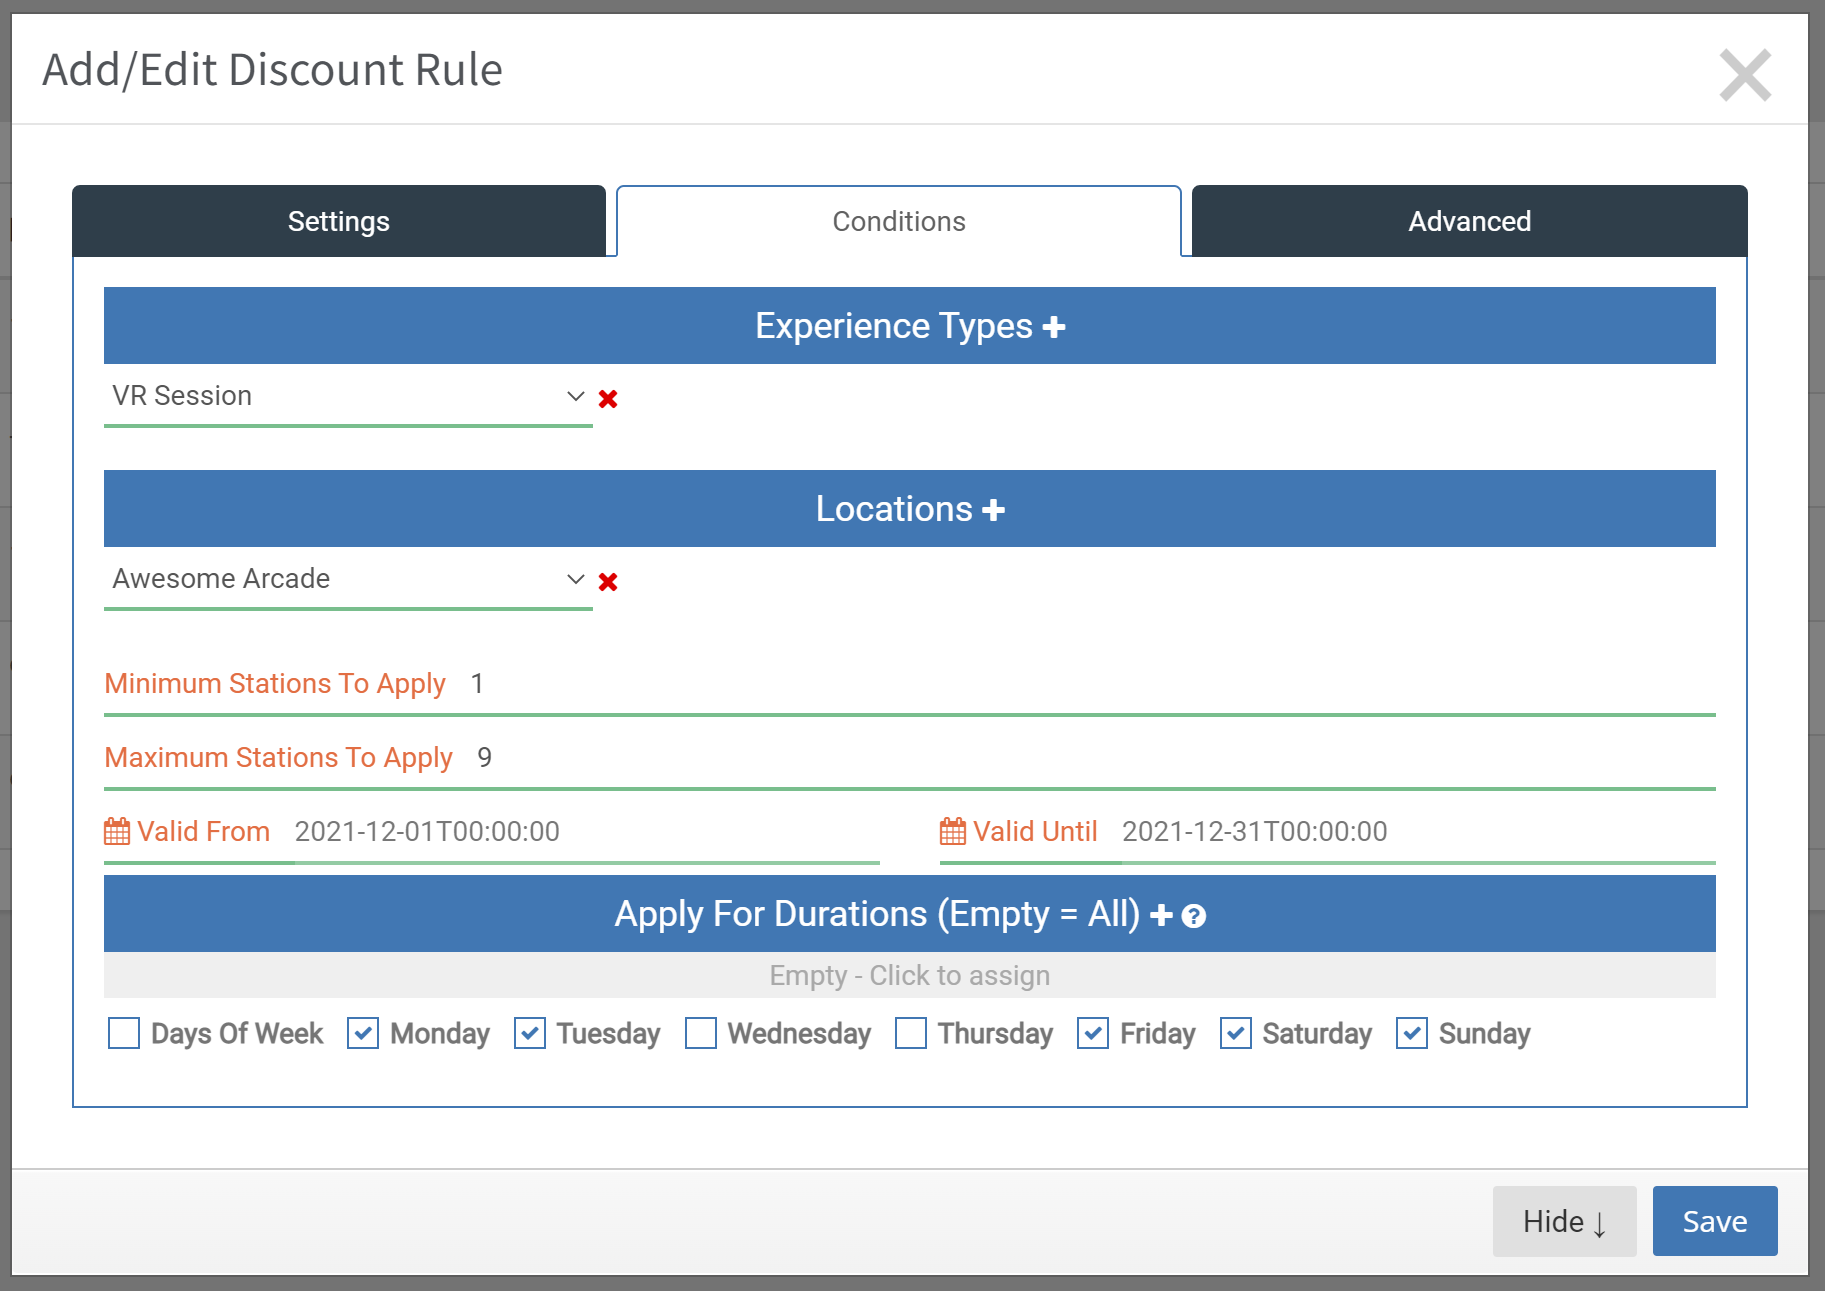
Next, we have the Minimum and Maximum Stations To Apply, this would of course depend on your usage. But one use case scenario is if you have a discount past a certain number of stations, say for example 3. You would then set Minimum to 3 and (again, for example) Maximum to 5. And when someone books a session with 3-5 stations, then this discount will apply to those.
Valid From and Until will set when the discount can be applied. Choosing the Apply For Durations lets you set any combination of specific durations you want the Discount to apply to. And, lastly, you can choose which days you want the discount to be applied on. Based on all these combinations, it’s certain you can see how very narrow and precise you can have discounts. Again, keep in mind Discounts still need to be attached to Work Rules, but more on that later.
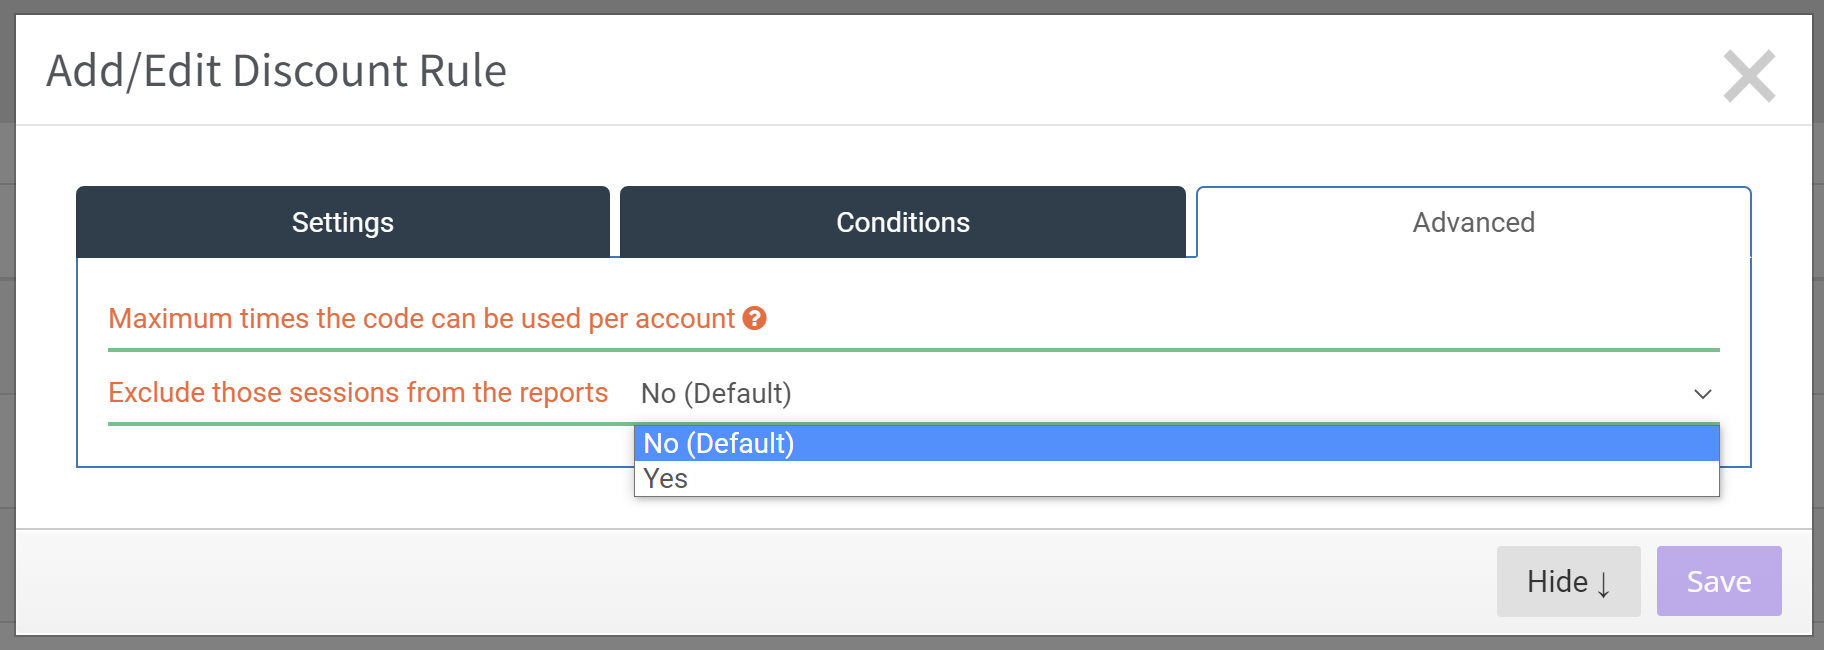
The last tab, Advanced, is optional settings.
Maximum Times the Code Can Be Used allows you to limit how often a code can be used and is specific to if you have to Require an Account set on the Settings Page. If it’s blank, it offers unlimited usage. Otherwise, a number will limit usage to that quantity.
And lastly, if you want to exclude these sessions from reports, you can choose that from the 2nd option.
Once you’ve got everything set up, click on Save and your new Discount will be added.
Adding Discounts to Work Rules
Head over to your Operation Settings under the Business Setup tab in the Administration section:
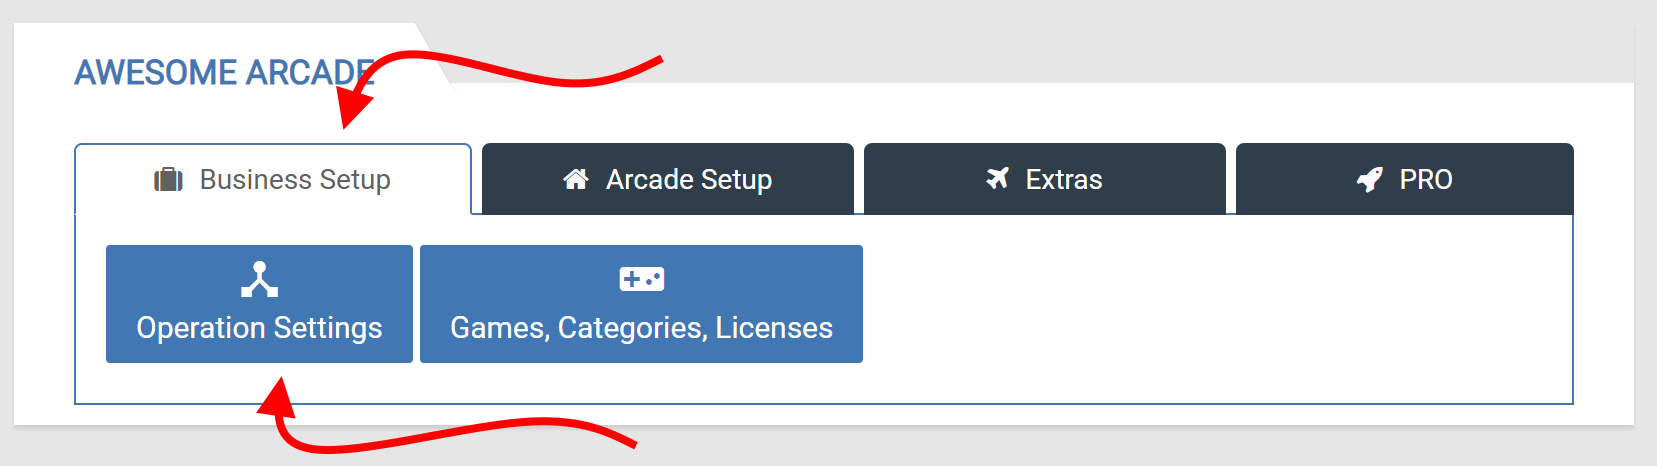
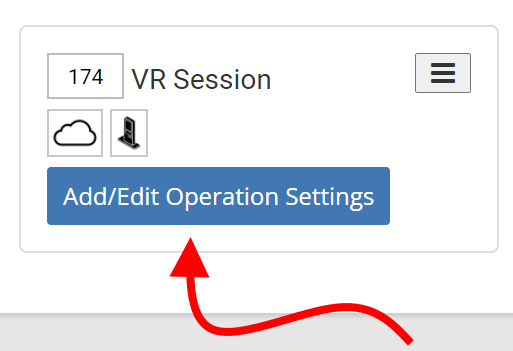
From here, you’ll need to click on the Add/Edit Operation Settings of the Experience Type you want to make adjustments to and enter into the Work Rules section:
Once in the Work Rules, edit or create a new Work Rule and head over to the Billing Tab:
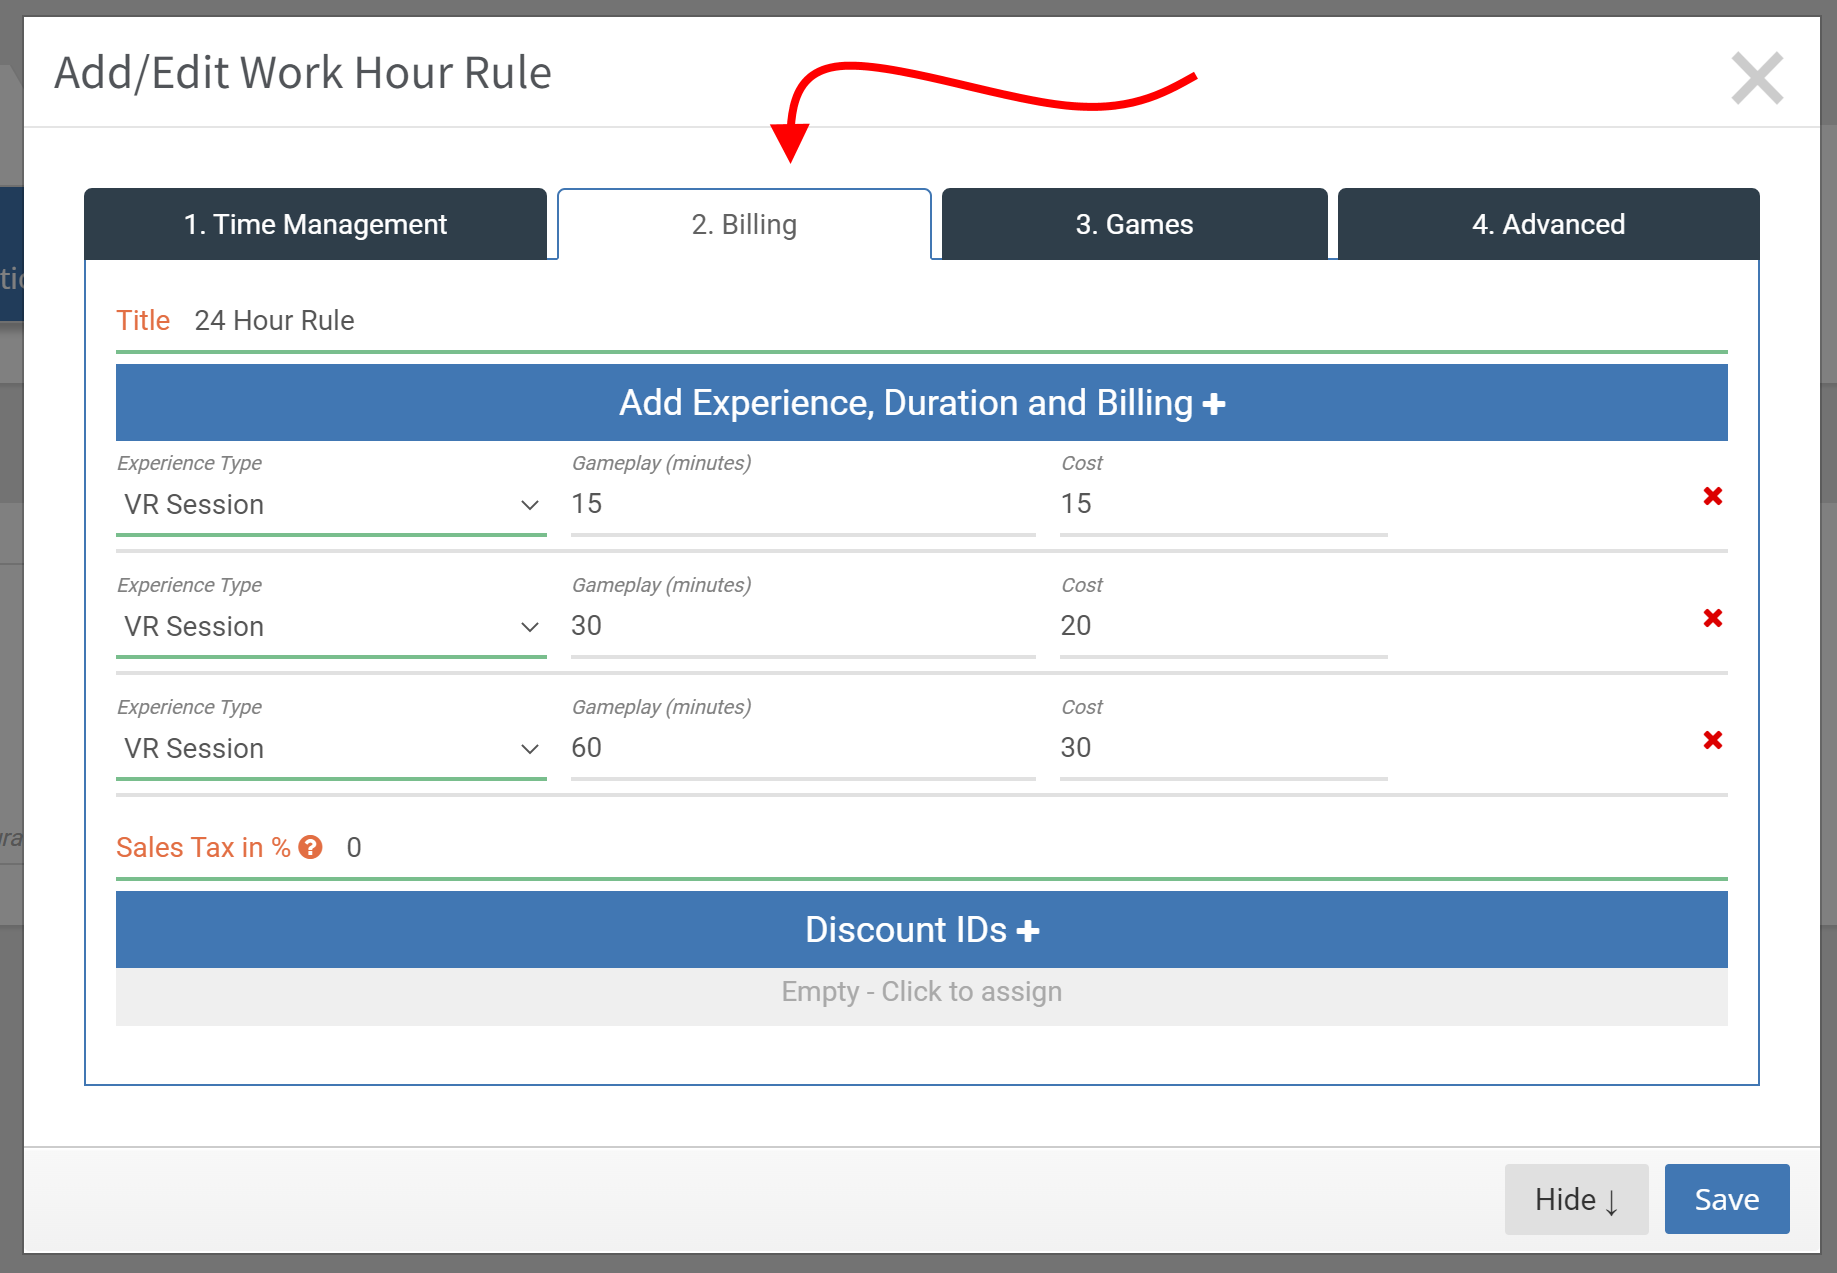
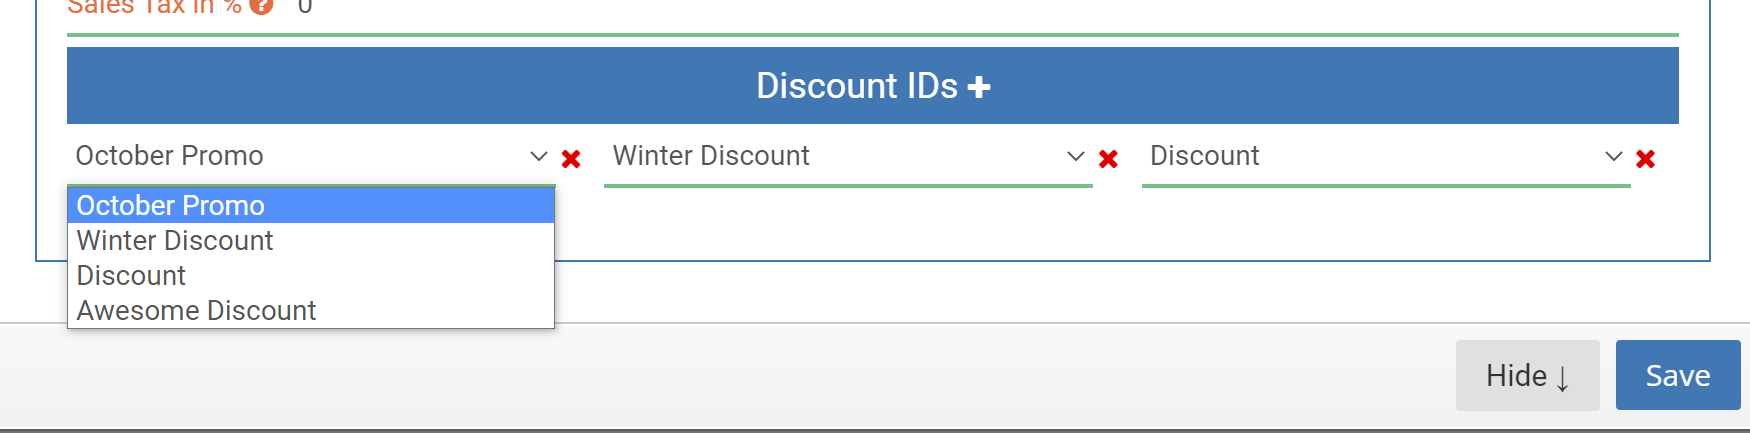
From here, click on the Discount IDs + button as many times as you need to to add as many Discounts that might apply to this Work Rule. Keep in mind that Discounts have their own set of criteria and may not apply to a specific Work Rule even if you add it. So be sure to set the Discounts up as necessary first before adding them to the Work Rule.
Once done, click on Save and you’re done. Moving forward, any bookings that come through against the Work Rule with a discount will have the Discount applied (again, assuming all the conditions have been met).
Adding Discount to Goods
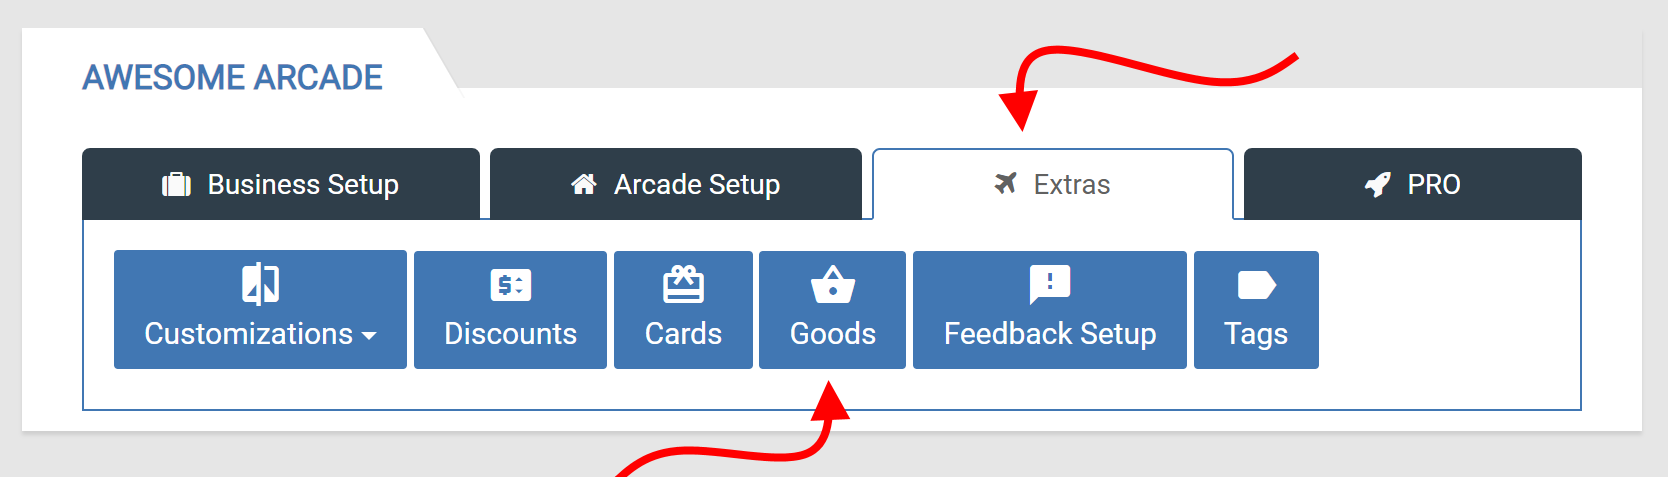
If you’ve added a Goods Discount, then you can head over to the Goods section which is found under the Extras tab in the Administration section.
From there you can create a new Goods item or edit an existing one by clicking on it. If you do have a Goods Discount set up, you will see the Discount button where you can add a discount to it:
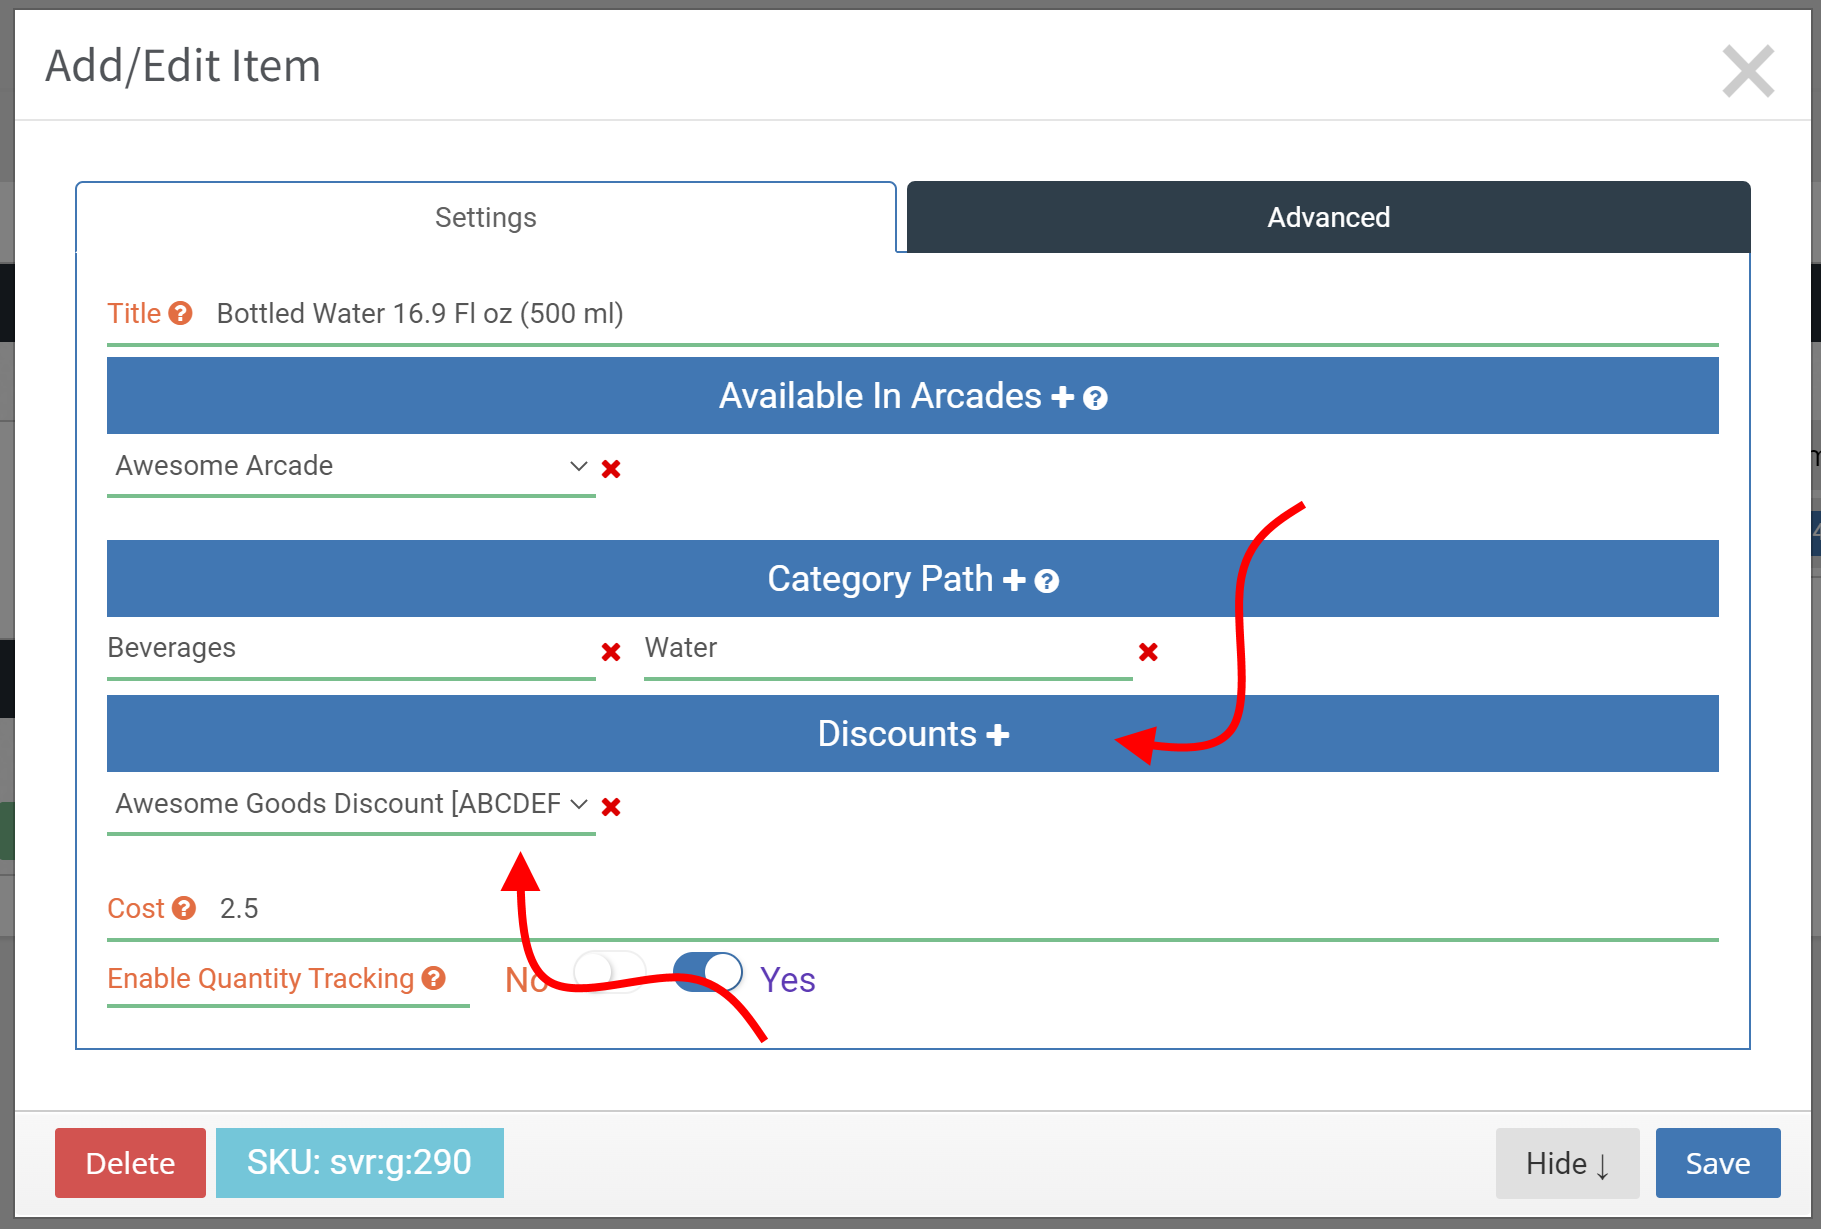
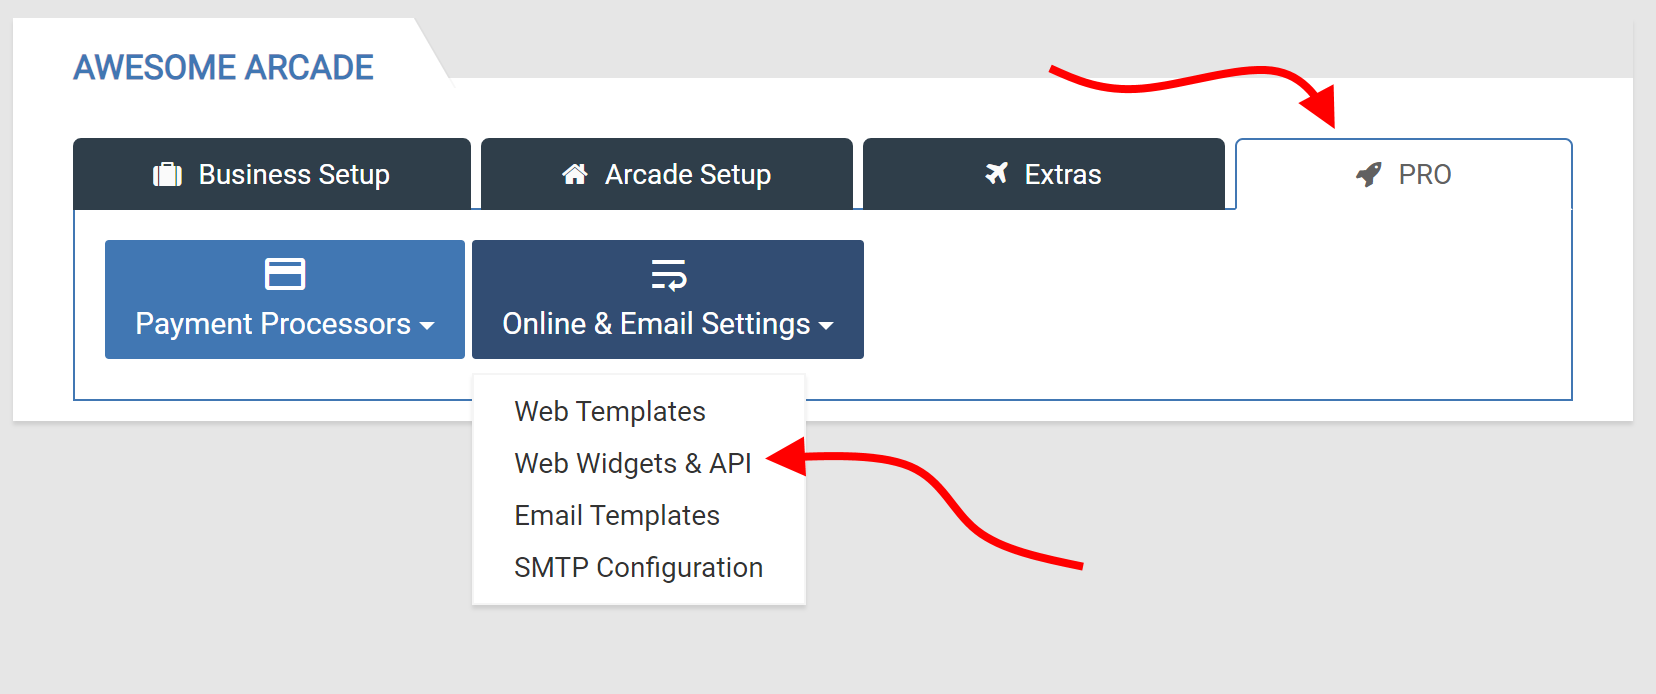
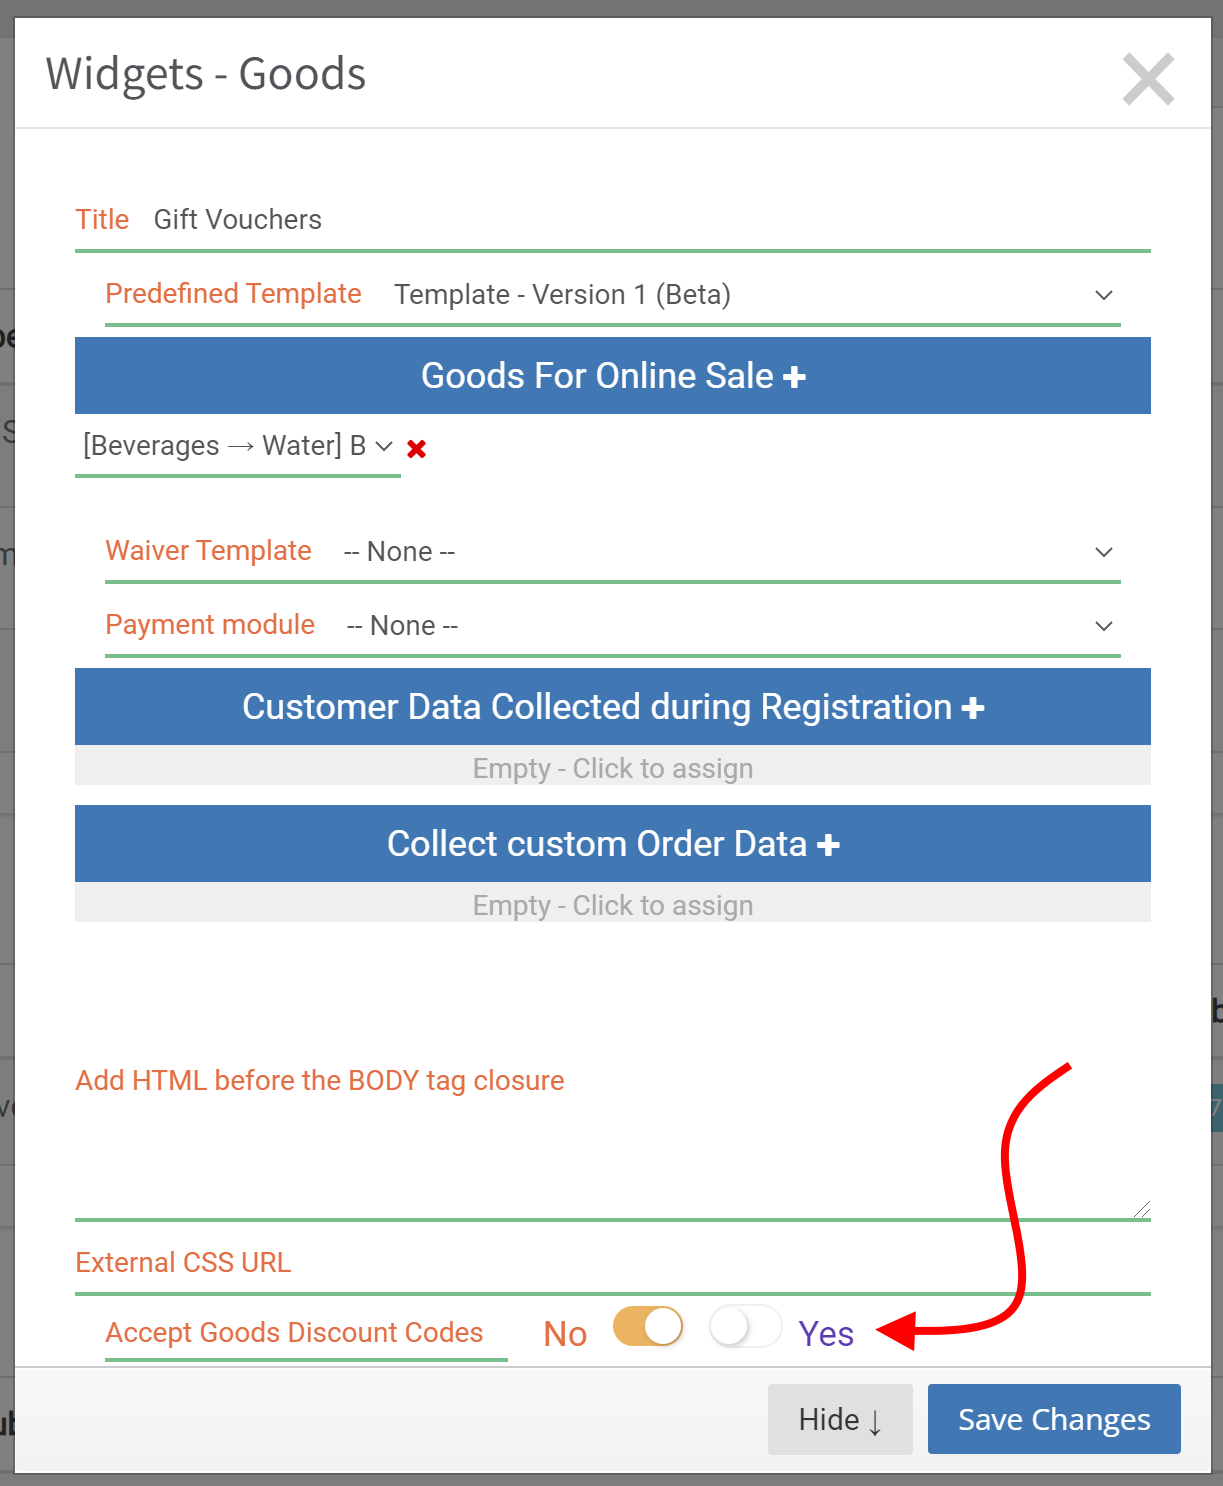
Doing this will open up the option to allow Discounts on this item. As per usual, you have the ability to make decisions even further down. The next step would be to add the option to allow Discounts in a Goods Widget. Head over to the Web Widgets & API section from within the drop-down of the Online & Email Settings button under the Pro Tab in Administration:
The bottom section is where the Good widgets are located. Typical Goods Widgets would be the typical things like T-Shirts or things of that nature, but also is the method used for selling Gift Vouchers. You can create or edit an existing Goods Widget which will open the settings. The key here is the bottom will have an option to accept Discount Codes for this particular Widget:
With Goods Discounts, a customer would need the code you added to the Discounts.