How Can We Help?
Introduction
“Experience Add-On” is a purchasable add-on for Synthesis VR Essential Access .
Modules & Add-Ons are purchasable features that increase the functionality and capability of the Synthesis VR platform.
The “Experience Add-On” allows you to create and manage custom VR Session Types..
Additional Notes:
- The Experience Types Add-On is built on top of the VR Session Manager Module, which is required.
- The “Experience” Add-On and “VR Session Manager” are purchasable with free credit
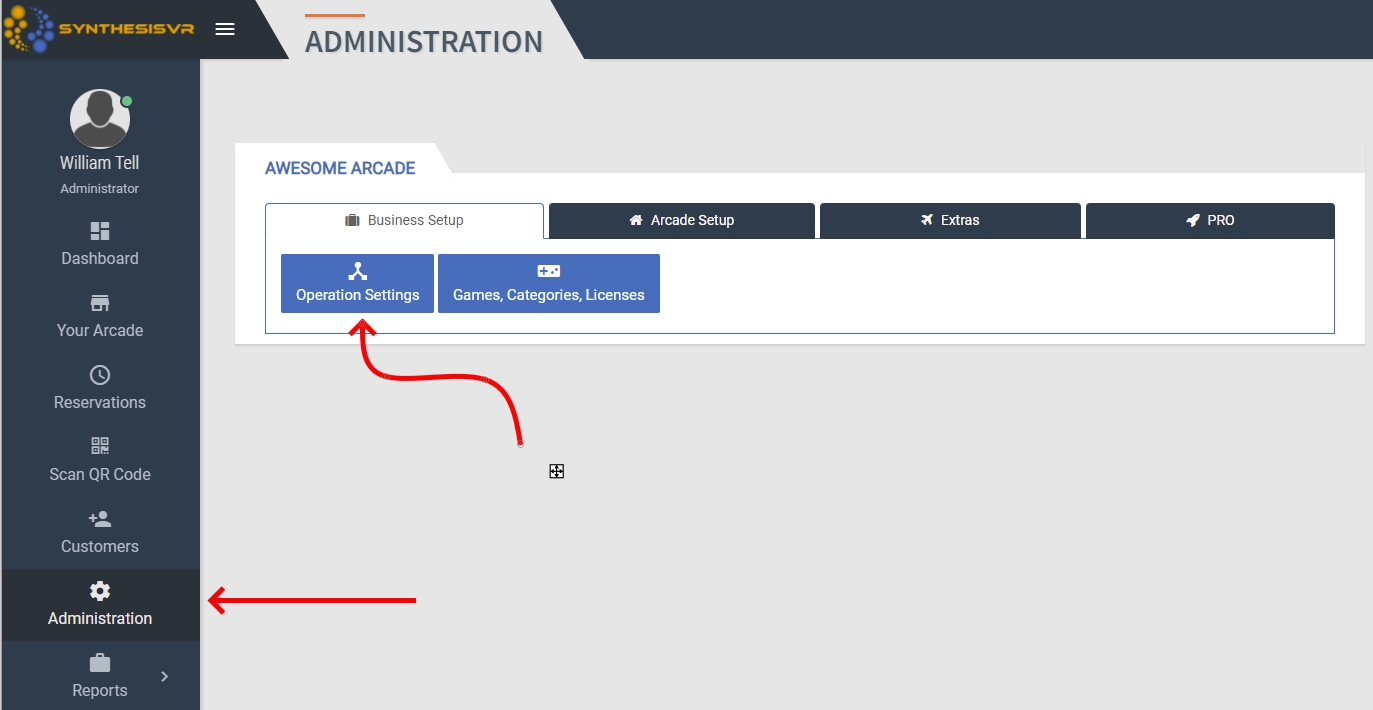
- From the Left Menu – Click Administration – Arcade Setup – and then click on the “Experience Types” button.
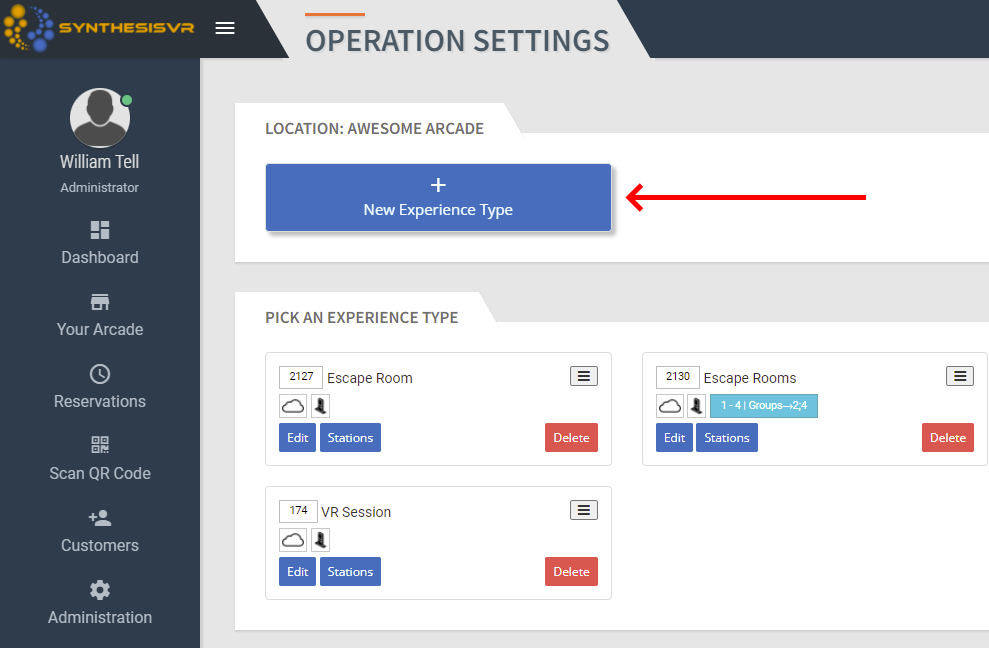
- Click on the “New Experience Type” button on the left and then fill the information in the popup.
- Click on the “Enable For VR Arcades +” button and that will add a drop down menu choice allowing you to choose which arcade location(s) you want this particular Experience Type to be available. If you have more than one arcade/location, you’ll need to add multiple locations by clicking the “Enable For VR Arcades +” button again for as many locations as you have. You will then click on the drop down menu to choose each location.

- Enter in the title of the Experience Type in the “Title” section. Enter in the description of the Experience Type in the “Description” section. Note that the description will appear in your online booking widget, so keep it informative and concise.
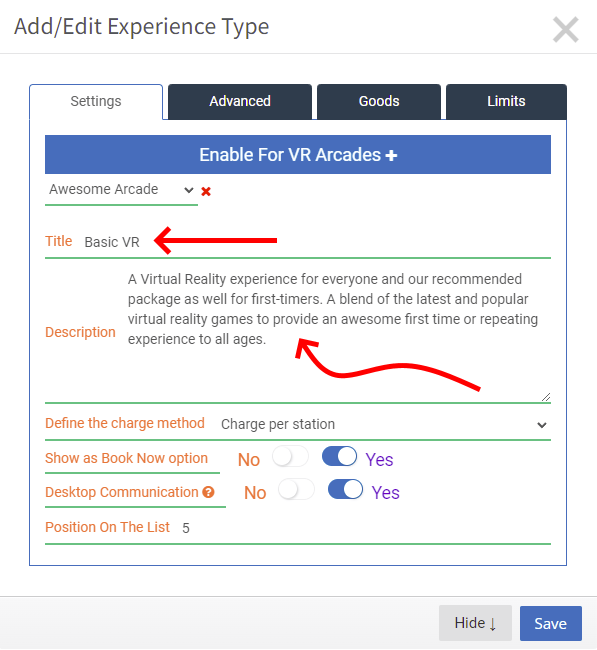
- Define the charge method: Here you can select in what method you prefer to change for the particular experience type. You can either charge by stations or for the experience, whereas the party booking come into play.
- Show as Book Now option – Enable this if you want customers to Book Online using SynthesisVR booking widget.
- Desktop Communication: Default value should be set to Yes unless using it for Virtual Stations which is not the default case.
- Position On The List – If you’d like your Experience Types sorted manually, you will want to enter in the number position within the list you want this Experience Type listed within the “Position On The List” section. Sorting manually will allow you to see them in a specific order when making a reservation and through online bookings, etc. This section is not required and if left blank, Experience Types are sorted by when they were entered.
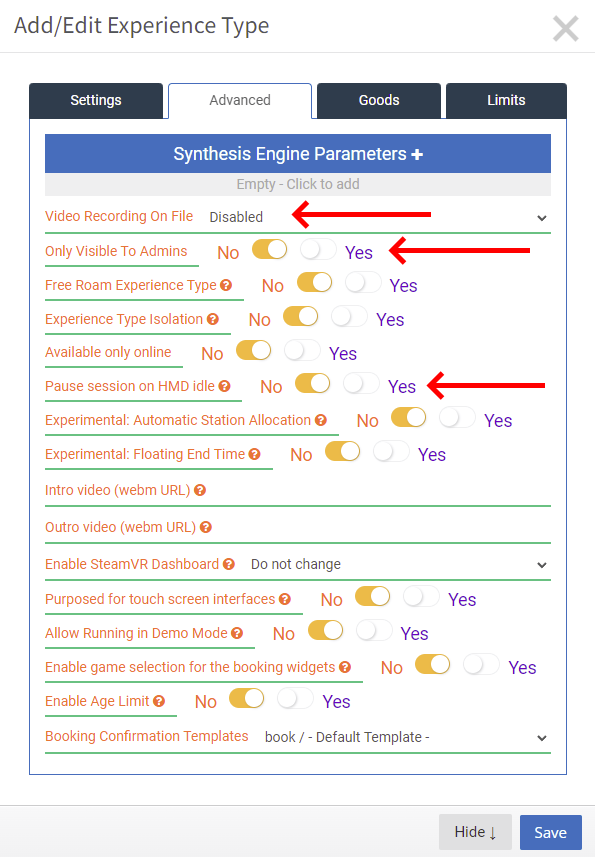
- If you’ll be using SynthesisVR to initiate recordings in this particular experience type, choose “Always Capturing” or “Disabled, but can be turned on by the operator” in the “Video Recording On File” drop down menu, otherwise leave it at “Disabled” to not allow video recording.
- If this Experience Type should only be available to Admins, choose yes from the drop down menu in “Only Visible To Admins”, otherwise leave it at “No”.
- On enabling “Pause session on HMD Idle” the session will be automatically paused on being idle and will resume on moving again.
- Intro Video and Outro Video – If you want customers to watch a certain video before the start of this experience and after the end of an experience, give the necessary URL on these fields.

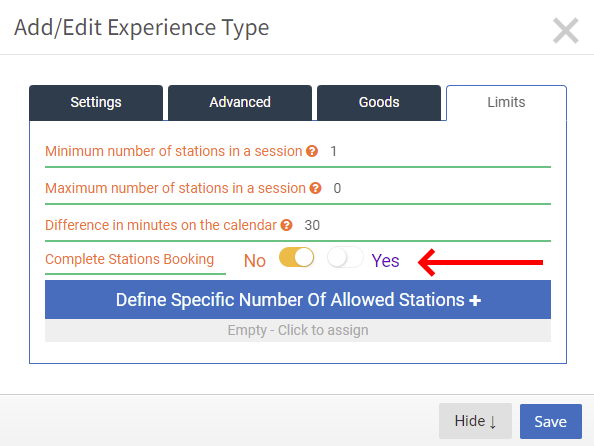
14. The minimum number of stations that can be booked for the particular experience can be defined using Minimum number of stations in a session.
15. The maximum number of stations that can be booked for the particular experience can be defined using Maximum number of stations in a session.
16. Difference in minutes on the calendar allows you to decide the time difference in between the booking slots.

17. If this Experience Type is for all stations, then choose “Yes” from the “Complete Stations Booking” drop down menu. This will be most useful for walk in sessions for a full venue and will save a few steps. This would also be good for online bookings for full venue reservations. If this is for individual stations or anything less than the full venue booking, then choose “No” from the drop down menu.
18. Once you’ve entered in all the necessary (and optional) sections, you will see that the “Save” button is now solid and clickable. Click that to save, otherwise your edits will be lost. If you want to exit and start over click the tiny “x” button in the top right of the window or click the “Hide” button at the bottom of the window.