How Can We Help?
Overview
To switch between The Station View and the Timeline View, click on the “Timeline View” switch at the top. Note that this is a local switch and would need to be set on each of the devices that access the Your Arcade page.
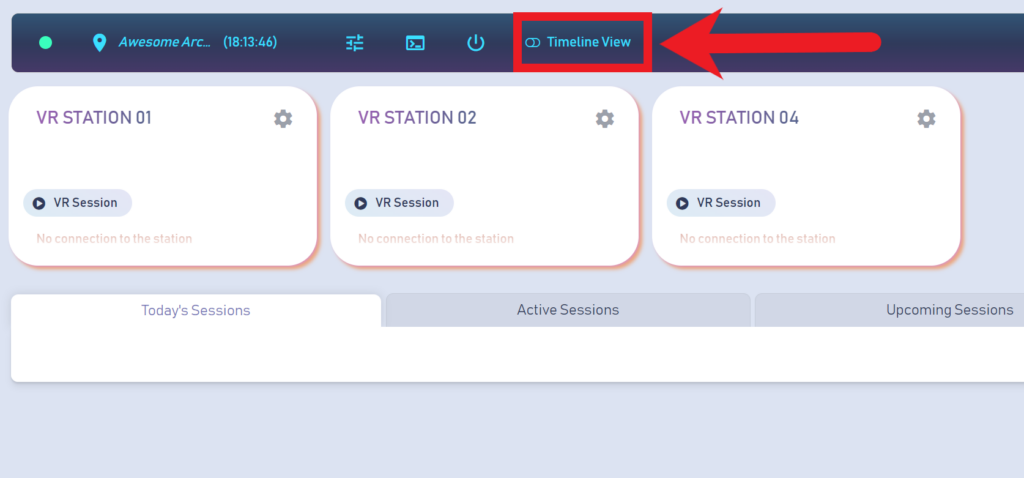
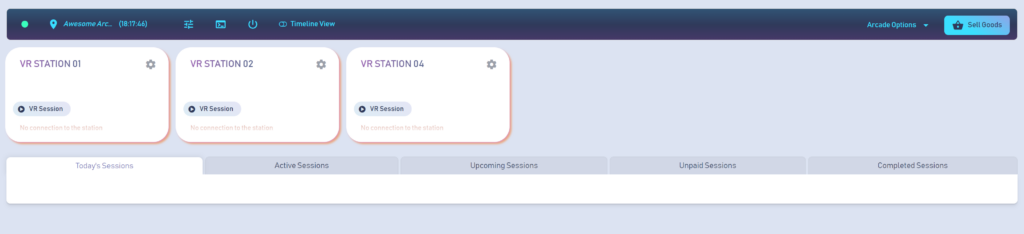
Station View:
Timeline View:
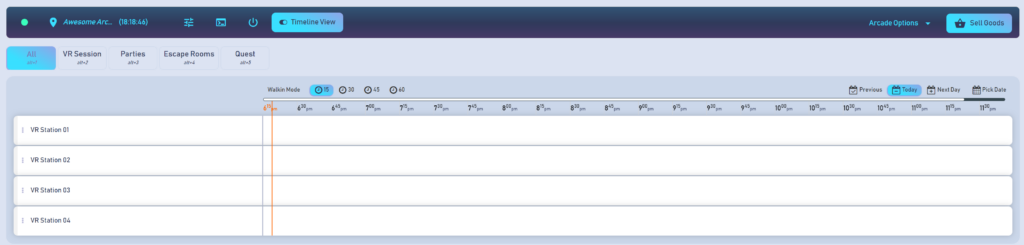
On the left side of the Timeline View, you’ll see all of your stations listed sorted alphabetically.
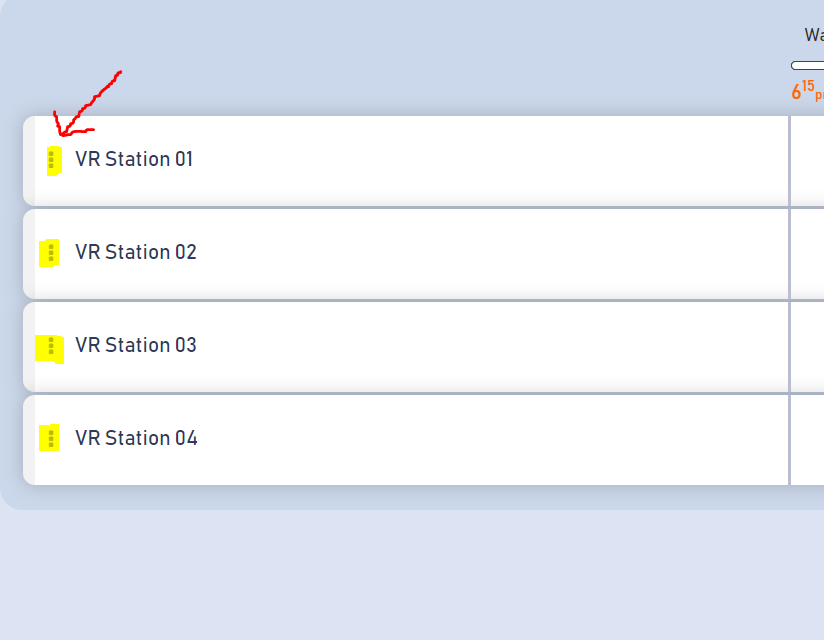
On the left of each station is a button that will bring up station specific settings (including things like Wake-on-LAN, Station Shut Down, etc). If the station is detected as connected the color of the button will be green. Offline or is a virtual station it will show as purple. On the right side of the section will be an icon of the headset in use on that station as well as controller battery percentage.
Along the top of the Timeline View, you’ll find the different experience types you offer. You can, of course, click on each to show those stations the experience type is attached to and any bookings that use those stations. In addition, you can also click between the tabs using the Alt+[number} to switch. You can also change between them using Alt+ the left or right arrow to cycle between each experience type.

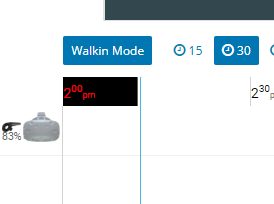
Below the Experience Type tabs on the left side is the Walkin Mode toggle and the time display. Walkin mode will be explained a little further down in this guide. Clicking on the time display will adjust how you want your time to display in the Timeline. If you click on, for example, 15 the Timeline will show time broken out into 15 minute increments. Clicking 30 will show the time broken down into 30 minute increments, etc. This will be remembered for the next time you open the Your Arcade page.
Underneath the Experience Type tabs on the right are the buttons to allow you to page through your days. This helps you see previous or upcoming reservations without having to go to the Reservations section.

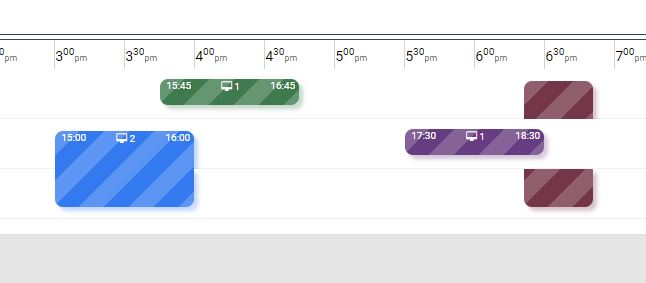
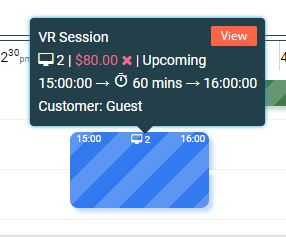
And, of course, the main section of the Timeline View shows the sessions/reservations all broken out by station and time. Colors are determined randomly and assigned a unique color for each session so it’s easy to identify which sessions are together and which are separate. Hovering over each session block will give you details on that particular session. Clicking on a session (or clicking on the View button in the popup details) will bring up the session summary which will be discussed later.
Scheduling: Future Reservation:
Somewhere along the Timeline, ideally close to the time you want to schedule, right click on one of the station’s timeline (again, ideally one of the stations you want to schedule for, but not a requirement). This will bring up the schedule menu. Click on the Schedule button. You can click on the X button or press Escape on your keyboard to get out of this menu.
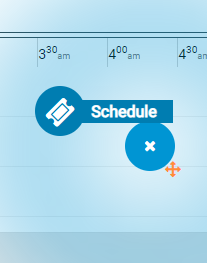
After you click on Schedule and once you start moving the mouse, you will be able to start putting in the session reservation. Depending on which direction you move your mouse (left and right along the Timeline) from the point you right clicked, you will be either adding time forward or time backward. Meaning that if, for example, you right clicked at 4pm and you moved the mouse to the right, you’d be adding time for after 4pm (starting at 4pm) and if you move the mouse to the left you will be adding time prior to 4pm (ending at 4pm).
If you move your mouse up or down along the Timeline, you will be able to add/remove stations within the session.
Once you’ve got a basic setup of what you want to schedule (don’t worry about being precise, you can refine later along this process), you will get the next set of options for scheduling. If everything looks good to you, click on the Schedule button at the top and that will bring up the Sell Ticket popup to complete the booking (again, you can continue to edit in that popup).
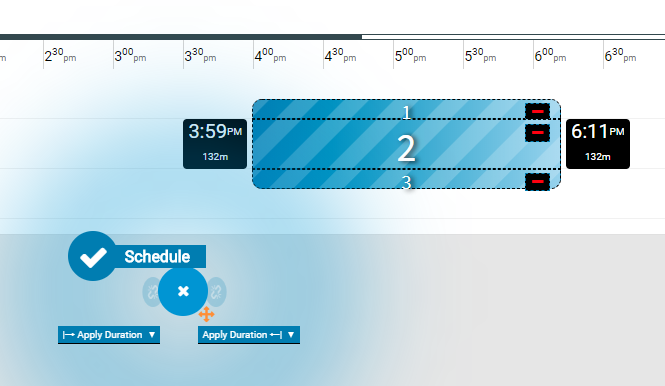
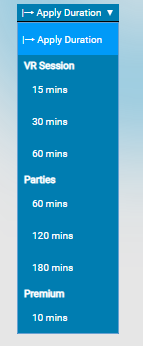
In the bottom of this initial popup, you will have the option to pick a specific duration based on your Experience Types and Work/Business Rules. The left side will choose a duration that starts at the time on the left side, and the right side will create a duration that starts at the time on the right side of your selection.
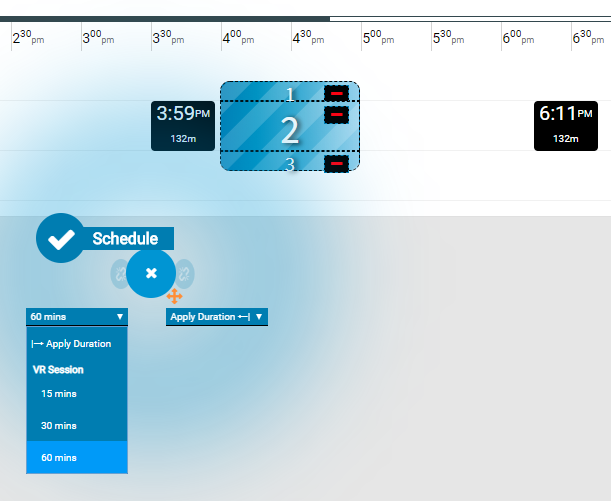
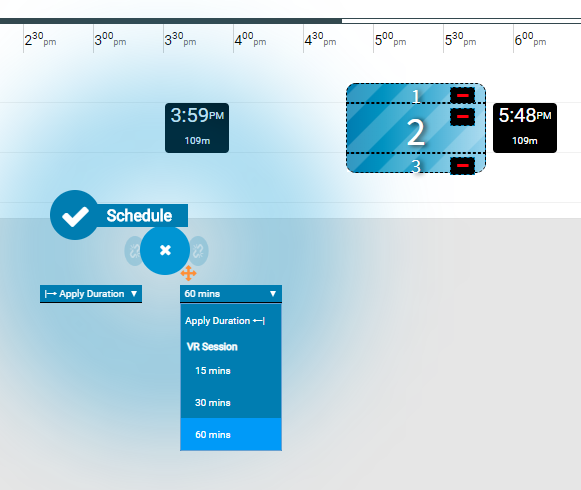
If you’re booking from the “All” tab, you will be given all Experience Types and times within those Experience Types (so long as you’re scheduling within the Work/Business Rules of those Experience Types).
If you’re booking something for today, you will be given additional options to Snap Left and Snap Right. Snap Left will let you “snap” the booking to start at the end of the next session booked on that/those station(s) or immediately if you have no prior bookings. Snap Right will only be visible if you have booking on that particular station(s) and will “snap” to the beginning of the next session. Note that if you have cleaning times set in your Work/Business Rules, those will be taken into account as well.
Final tweaks that can be applied to the booking before you go to the next step include the ability to remove a station from the booking by clicking on the red minus sign in the booking and adding a station by clicking on the big gray + button on the booking.

Additionally, if you hover over the session and you see your cursor change to a plus sign, if you hold down the mouse button while the plus sign is showing you can drag the session to the right or left to change the start time.
Once you have got all your things you wanted to set up done and you’ve clicked the “Schedule” button, this will bring up the final Sell Ticket popup to schedule and record/take payment for the session. From there, you can still change the Experience Type (1), the Duration (2), the Number of Stations (3), the Date (4), and the start time of the session (5). Additionally, here you can attached a customer to the session (6) and add a Comment (7), and, again, recording a payment (8) (or noting if it will be a Post-Paid session).
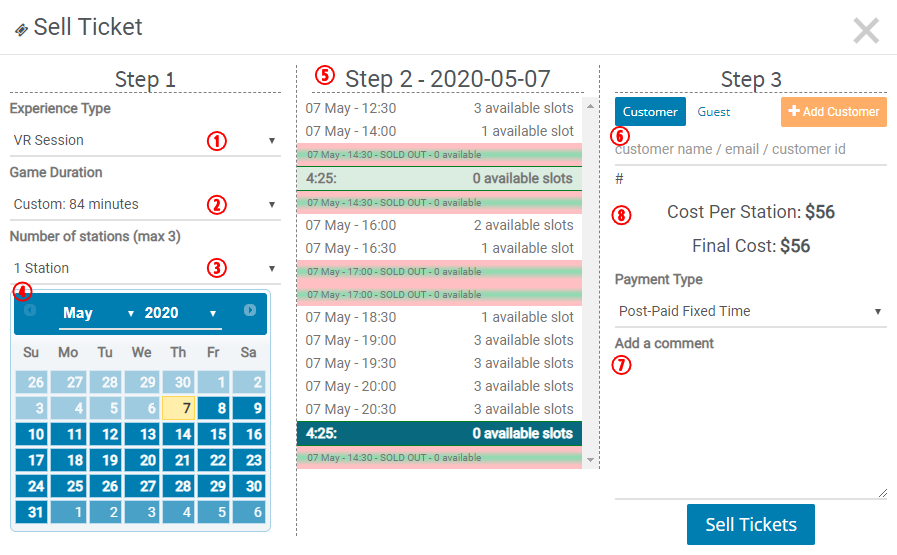
Once you’ve made sure everything is as it should be, click on the Sell Tickets button on the bottom right and your session will be booked.
Scheduling a Walk In Session
To start a Walkin Session, first click on the Walkin Mode so that it is highlighted.
At this point when you right click anywhere on the Timeline, you will be presented with a New option in addition to the Schedule. If you click on Schedule, that will open up the Sell Ticket popup and you can schedule a future session that way. If you click on the New button, you will be presented with the time on the Timeline to schedule. In Walkin Mode, time will always start now and you would be scheduling the end time.
At this point, you can do most of the same things you were able to do with scheduling a session for the future. You can apply a specific duration, you can add or remove stations from the session, and you can snap to the next session.
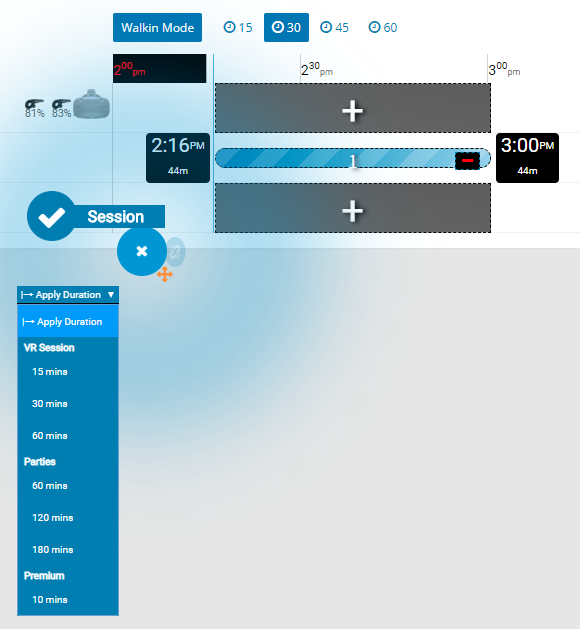
Once you’ve got things the way you like them, click on the Session button (the one with the check-mark) and that will open up the Walkin session).
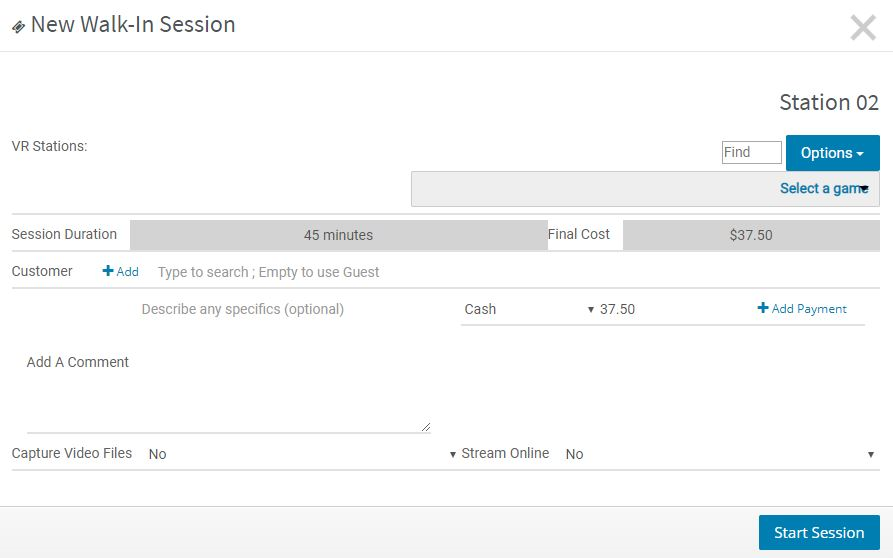
Note that if you do not choose a duration within a specific Experience Type in the “Apply Duration” button or if you are not in one of the Experience Type tabs at the top, you will be prompted to choose which Experience Type to use before the Walkin popup will appear.