How Can We Help?
Where things like Experience Types and Discounts and Game Categories are core components of SynthesisVR, Work Rules are where all those core components come together and is where the full power of SynthesisVR is realized. This allows you to have multiple combinations of pricing, durations, times, etc. Once you have an understanding of how to set up all your Work Rules, these will branch out to things like Booking Widgets, etc.
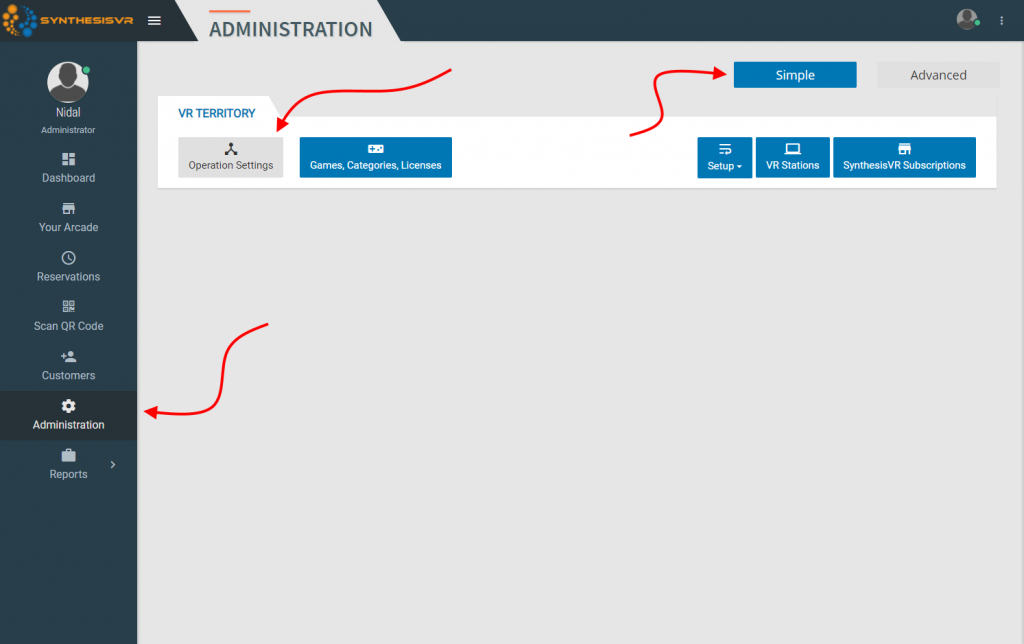
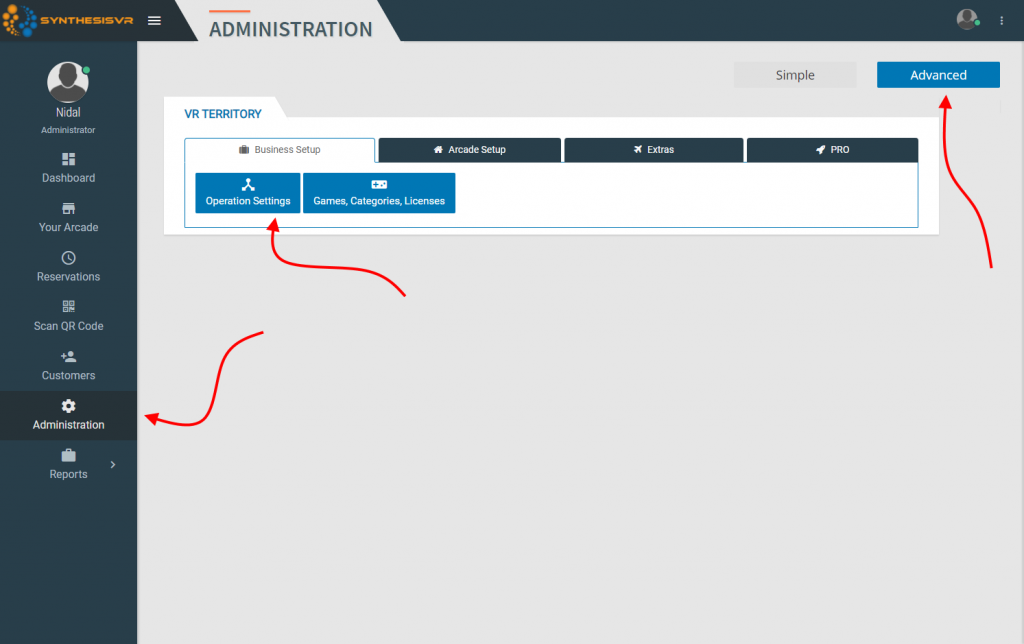
From the Administration section, click on the Operation Settings button (you need to be in the Business Setup tab if using the Advanced view).
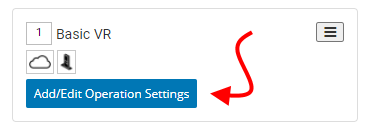
From the Operation Settings section, from one of your Experience Types, click on the Add/Edit Operations button. Note that if you haven’t added any Experience Types, please review the Operation Settings and Experience Types sections in the Knowledge Base.
Once in the Experience Type, you will be presented with the option to create either a Duration Based Rule or a Per-Game Rule. In this article, we’ll be focusing on the Duration Based Rule.

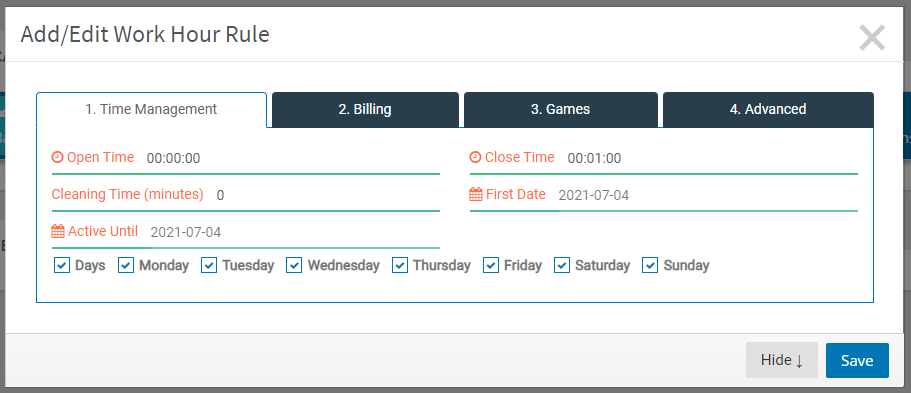
Clicking on the Add Duration Based button and that will open a new Work Rule. The tabs are set up in sequence to help follow the proper work flow. In creating a new Work Rule, start in the first tab, Time Management which determines when this Work Rule is going to be active.
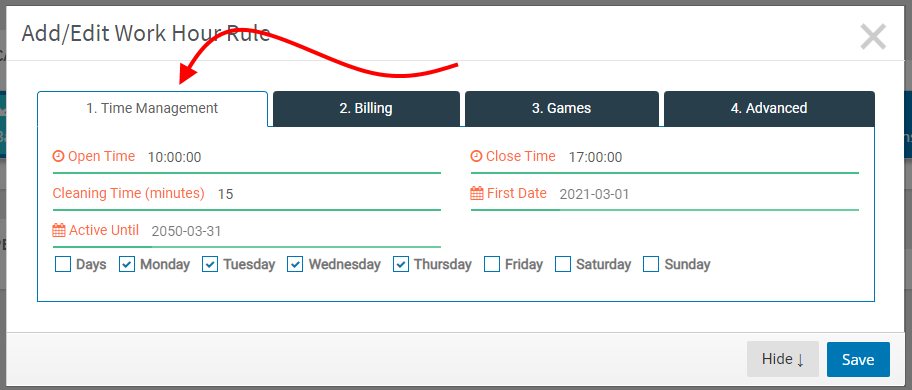
- Open Time: This is what time the Rule is to begins. Note that time will show in 24 hour, but when entering in times, you can use “5pm” or “10am”
- Close Time: This is what time the Rule ends. Same point about time as above.
- Cleaning Time: This is the number of minutes that a VR Station will be in cleaning time (and not bookable) after the end of a session.
- First Date: This is the day the rule would be being to be active.
- Active Until: This is the last day the rule will be active
- The days of the week can be checked off to determine what days of the week this rule is active. If you check “Days” it will reverse the checkboxes. So if something is checked, it will be unchecked and vice versa.
Not that if you are creating a 24 hour rule (typically something you would do if you are NOT using the SynthesisVR booking system), then the Open Time would need to be 00:00 and the Close Time would need to be 24:00.
Once you have the Time Management set up, it’s time to move to the Billing tab where you can set up you your durations and pricing.
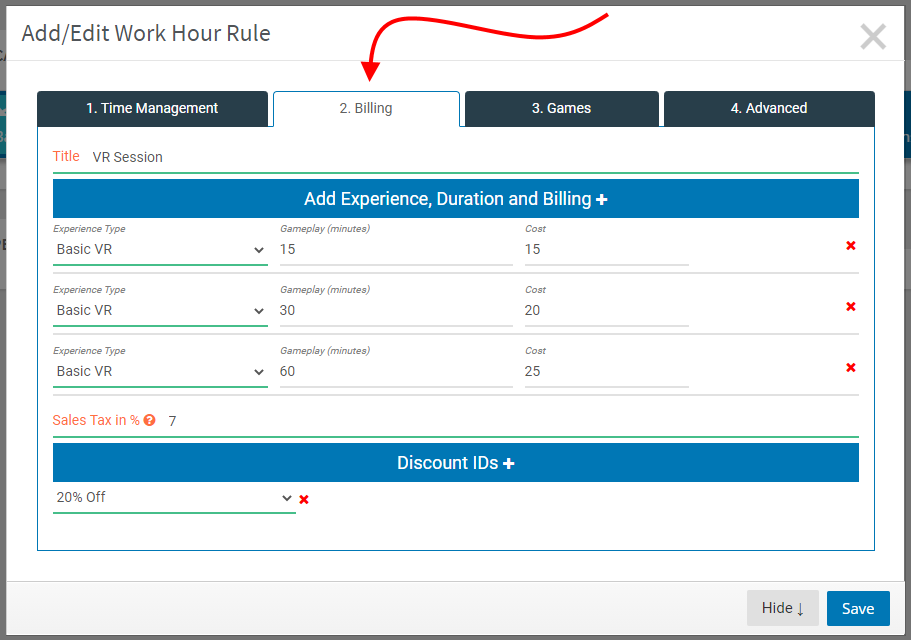
- Title: This is an internal Title and is only visible to you and in the Experience Type section. It’s best to make this something that you would recognize (like VR Sessions – Mon-Fri” or something.
- Add Experience, Duration and Billing + section: This is where you would be adding in your durations and pricing. The blue bar is a button and when you click on it, you add a new line item below which contains the Experience Type, the Gameplay, and the Cost. Within the section, you can delete a line item by clicking on the red x.
- In the Experience Type column, the appropriate Experience Type will be chosen as you’ll be creating the Work Rule from within the Experience Type, you can use the drop down menu to change that. It is advised to keep the Experience Types the same in a single Work Rule, but we will discuss an exception further down.
- Sales Tax: If your state or country requires you to charge tax, then this is the place to put it. Leave blank if you don’t charge tax.
- Discount IDs + section: You can add Discount Rules in the section. Click on the blue bar to add any quantity of Discount Rules to the Work Rule. You can remove Discount Rules by clicking on the red x. Note that Discounts have their own set of rules and may not actually apply this a rule even if attached to it.
One thing to keep in mind in this section is that prices and discounts are only important if you are taking (or recording) payments within SynthesisVR. If your plans don’t include that, then you can put in 0 in the Cost column, but it’s generally a good idea to have pricing in there to avoid having to go back and fill that in later.
Once you have your Billing filled out, next up is the Games tab.
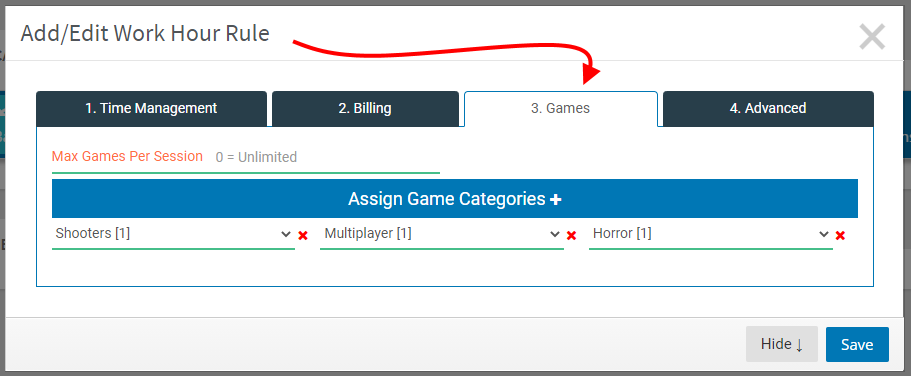
- Max Games Per Session: If you want to limit the number of games played in a session, this is where you would enter it. Note that this doesn’t limit the total number of games, it limits the different games played. So if you have it set to 4 and someone plays Elven Assassin, Arizona Sunshine, Skyfront, and RevolVR, then that will lock them out of other games but they can keep switching between those 4.
- Assign Game Categories + section: In this section, you would add the game categories you want to assign to this Work Rule. Clicking on the blue bar will add game categories and you can use the drop down menu to choose which categories you want. Clicking on the red x will delete that category. The order in which they appear in this section is the order they will show in the menus in the headset during a session.
One note on Game Categories, if you don’t assign any Game Categories, SynthesisVR will show all games it has detected installed in the menu in the headset during a session. If you add one category, then only the games in that category will show and there will be no categories shown. Once you have more than 1 category, customers will then see categories first when going into the menus (or when clicking on the Library icon in the SteamVR menu in the headset). You can find more information about Game Categories in the Knowledge Base article about them as they also have their own set of rules that might apply to the session.
Finally, we have the Advanced tab to look at.
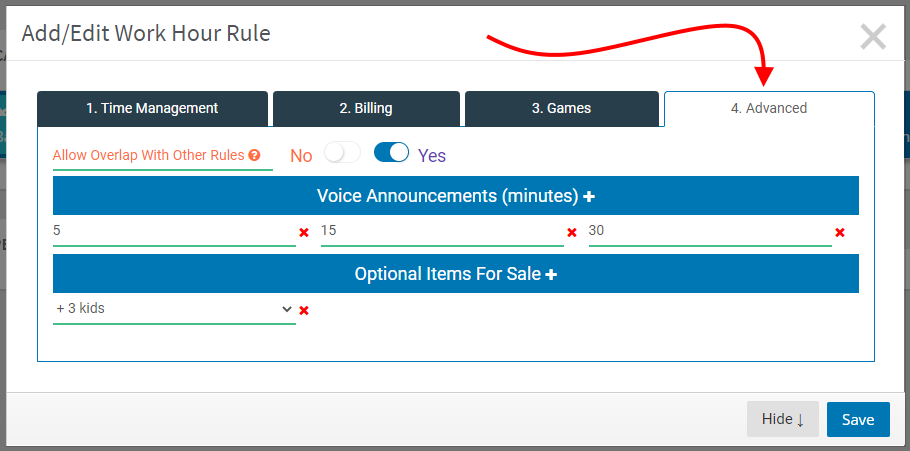
- Allow Overlap With Other Rules: When set to Yes, this Work Rule will work with others in the same Experience Type. Typically, you’d want to keep this set to Yes and be sure there are no direct conflicts with other Work Rules within the same Experience Type (for example, you shouldn’t have the same duration but different pricing in different rules within the same Experience type). By choosing No in this section, then this Work Rule will override any other Work Rule during the active times chosen in the Time Management section. By setting up Time Management appropriately, this could set up closed hours or, more specifically, will lock out any other Work Rules rules in the same Experience Types preventing bookings.
- Voice Announcements (minutes) + section: You can add any number of countdown announcements within a session. If a session reaches that time, an announcement will be made. This is customizable. The final announcement has it’s own separate customizable announcement. These are all text to speech, but we have an article on how to add in more natural pre-recorded announcements. As usual, you can remove any time announcement you want by clicking the red x.
- Options Items For Sale + section: If you have Goods set up, you can add them here. No, you cannot sell 3 kids. But this is set up as an add on to your Work Rules. This section will only be available if you have Good set up.
Previously it was mentioned that you should generally use the same Experience Types in the Time Management section. In the case of Allow Overlap With Other Rules set to No, then this would be an instance where choosing multiple Experience Types would be beneficial. So if, for example, you were going to be closed on July 4th, 2021, you would first set up your Time Management as follows:
And then your Billing tab would likely be set up like this:
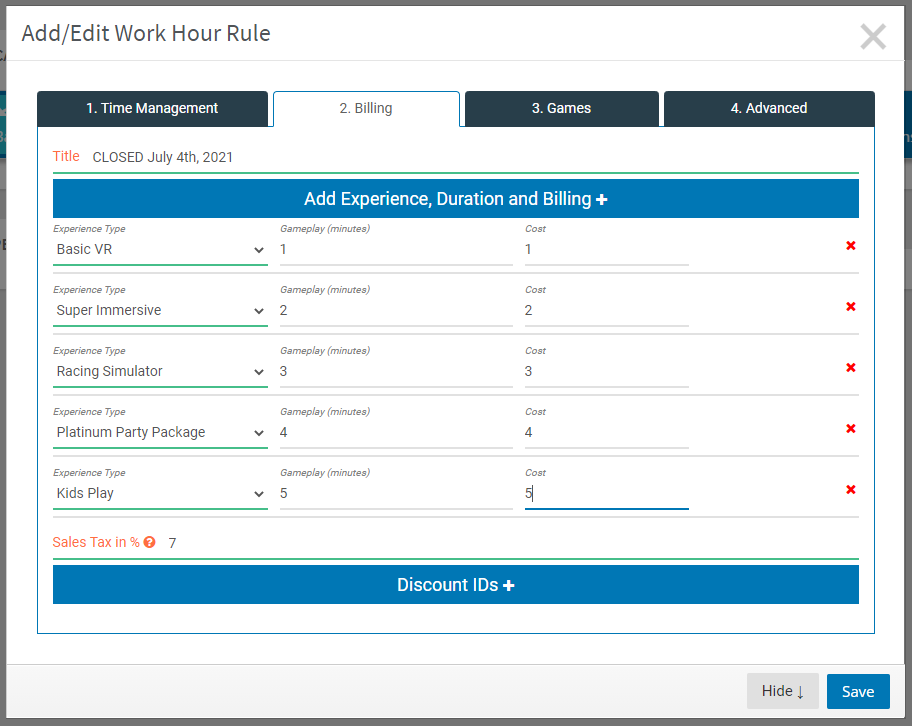
And if you now set your Allow Overlap With Other Rules set to No, this would essentially set your shop to closed on July 4th, 2021 for all those Experience Types.