How Can We Help?
This guide will go over the setup of the GOODS CONFIGURATION and the process of using goods to sell merchandise, add ons and so much more.
Since our goal is to provide you with a flexible and customizable Goods section, you will see that there are no pre-set categories or items. That being said you can organize and add items as per your needs and set up everything the way it will fit you best.
1. Adding categories, sub-categories, and items.
From the Advanced Settings of the Administration Section, click on Goods under the Extras tab: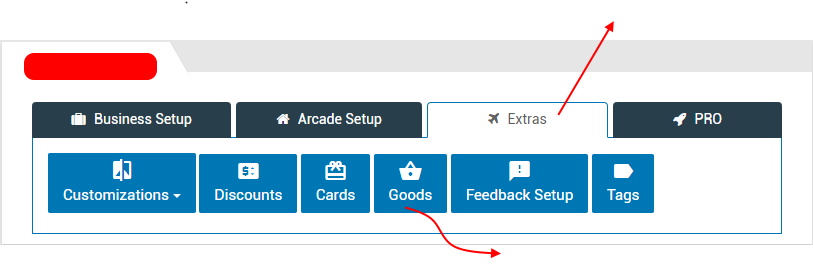
To add a new item, click on the 3 dot menu on the top right and then click on the Add Item button, which would bring up the Add/Edit Item popup.
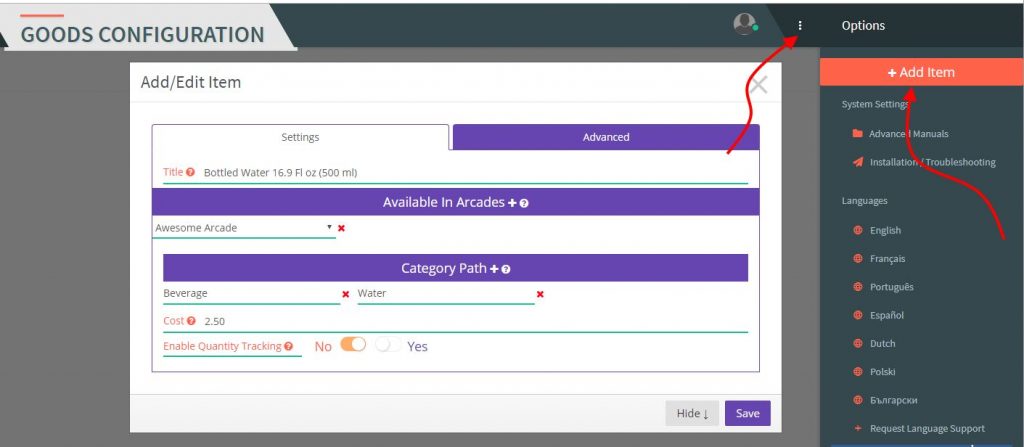
Fill in the appropriate sections as per the below:
1. TITLE – here you should add the name of the product you want to add, for example, Bottled Water. If you will offer different sizes of the specific item you will need to add each of them, for example
Bottled Water 16.9 Fl oz (500 ml) and Bottled Water 8 Fl oz (240 ml)
2. AVAILABLE IN ARCADES – when you click on it , you will be able to select your arcade from the drop-down menu. If you have more than one arcade you can set up different menu items for each of them, or set them all to share the same items. To add a second arcade, click on Available in Arcades again, and the second location will appear, and so on.
3. CATEGORY PATH – you can use this section to create your menu structure. To add the first category, click on Category Path, below it you will see a text box, where you can fill in the category name. This will be your main category. If you click on Category Path again, a second text box will appear right after the first one. The second box will be a subcategory of the first one.
Lets say that you will offer 3 types of items: Beverages, Snacks, Sweets. Those will be your 3 main categories, each of them can have its own subcategories for example: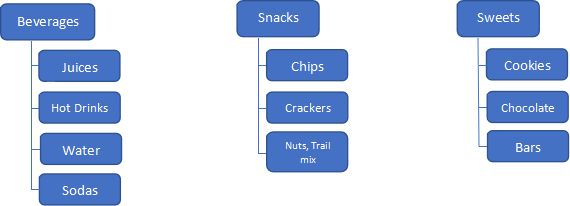
Each subcategory can have its own subcategories, this will allow you to create a more complex menu structure if needed.
4. COST – this will be the price of the item.
5. ENABLE QUANTITY TRACKING – If you select yes, you will be able to track the available quantity of the item that you have on stock in your arcade. In this case, if the remaining quantity is 0, the arcade operator will not be able to sell this item. After an item that has quantity tracking enabled is created, you will need to assign the proper quantity which you have on stock. This will be shown later in the tutorial.
In case you select no, the arcade operator will be able to add this item to the client’s order, no matter if the item has stock or not.
Under the Advanced Tab: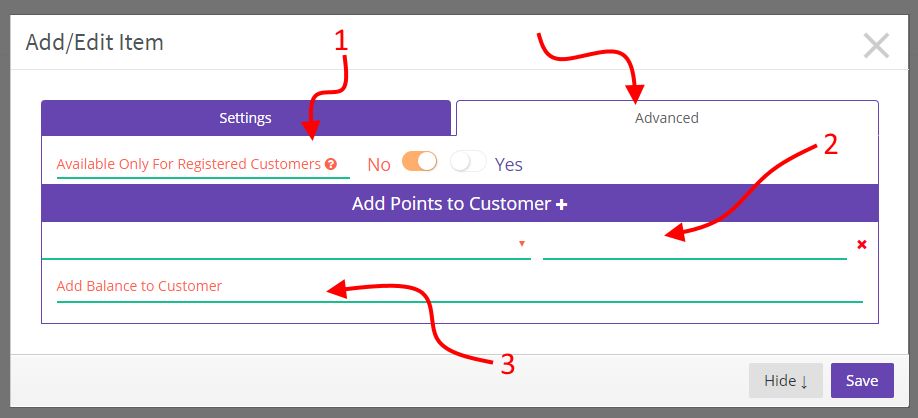
1. AVAILABLE ONLY FOR REGISTERED CUSTOMERS:
In some cases, you may what to have special limited items that would be available only for registered/regular customers. If you select yes, the arcade operator will be able to sell the item to only such customers.
2. ADD POINTS TO CUSTOMER:
3. ADD BALANCE TO CUSTOMER:
Once you’ve added a few items and you refresh the page, you should see something similar to the below:
You can click on any item to edit it if you need to make changes from the above.
ASSIGNING QUANTITY TO AN ITEM:
When one item is added with Enabled Quantity Tracking, by default is with quantity 0. To assigning quantity find the item and click on the plus button next to it:

You will see the following pop up: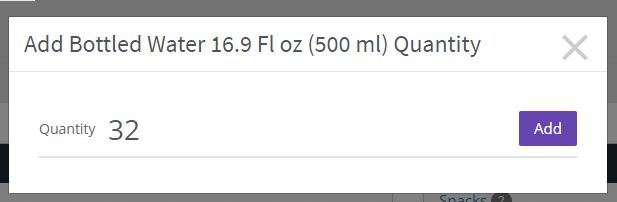
Enter the proper quantity and click on add. The pop-up then will close itself and the quantity will be added to the selected item.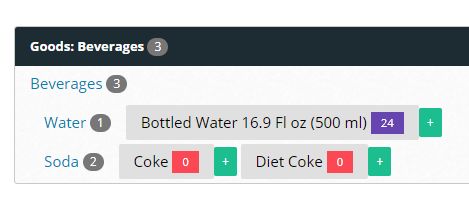
2. Selling Goods
Head over to the Your Arcade Section, click on the 3 dot menu in the top right and click on Sell Goods, which will bring up the following pop: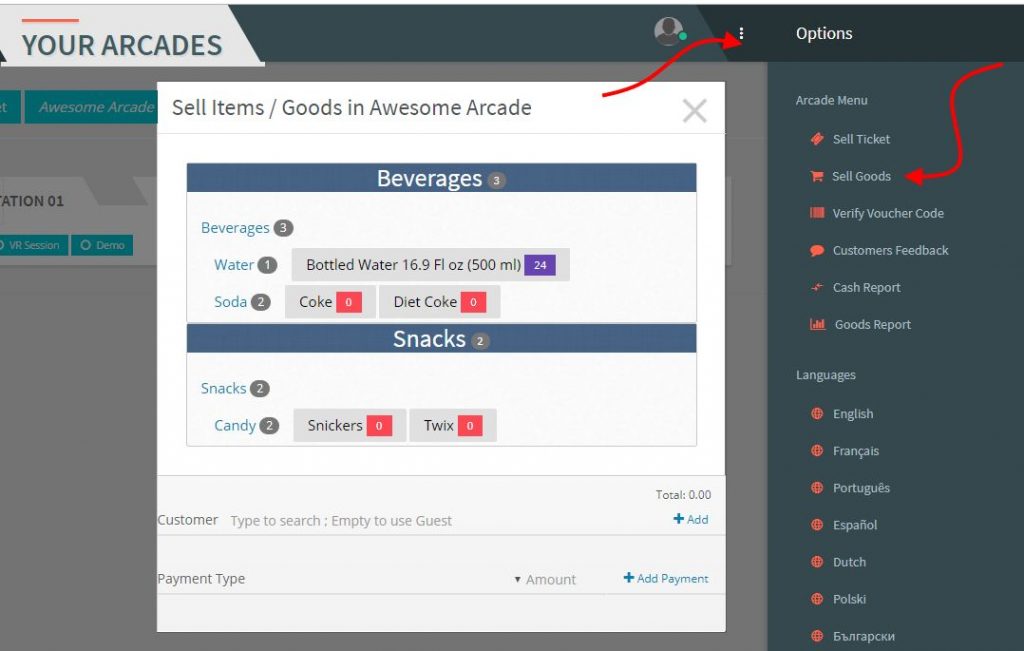
To add the item to the customer’s order, simply click on it. And the item will be shown in the bottom part of the pop-up. If this item is with enabled Quantity Tracking, the total remaining stock will be deducted with 1 automatically once you click on it.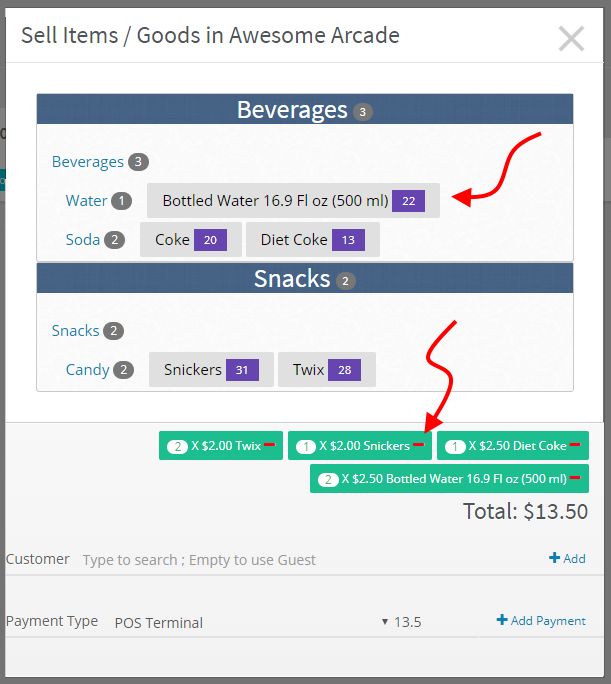
If you want to remove some items from the order, just click on the red minus next to the item. In case that this item is with Quantity Tracking enabled, the total available quantity will be increased accordingly.
If the arcade operator adds by mistake a higher quantity from an item, or the client changes his mind, when the red minus next to the item is clicked, the count will be deducted with one for every click. Let’s say that initially there were 3 Bottled Water items added, and this needs to be adjusted to 1, the employee should click twice the minus sign.
In the customer field, you can search for already registered customers, leave it empty for guests, or click on Add to add newly registered customers.
PAYMENT.
You can do cash payment, card payment, or split payment.
From the Payment Type drop-down, you will need to select the proper payment. Let’s say that the customer wants to do a split payment $10 cash and $10.5 on his card. Select Cash, mark $10 and click Add Payment.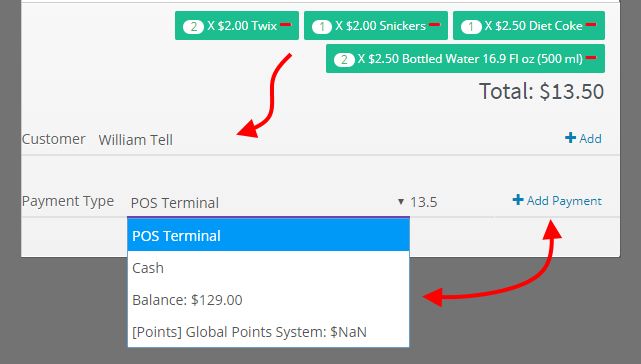
You will notice that the rest of the amount will be automatically recalculated and will be populated. Now just select the POS terminal from the drop-down and click Add Payment
Once the customer fully paid his order, the Complete Order button will appear. When clicked the order will be processed and the pop-up will close itself.
If the customer is already registered and has CC on file, this will be also shown as a payment option, the same goes for if the customer has an available balance.
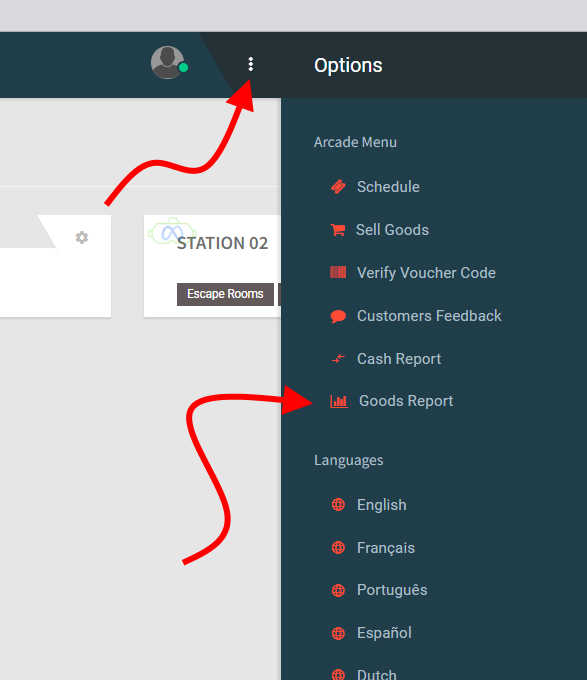
3. Reports
To access Goods Reports, you can access that from the 3 dot menu in the Your Arcade page and then click on the Goods Report:
When you open the report initially you will see all sales for the current day. From the bottom left you can change the date of the report.
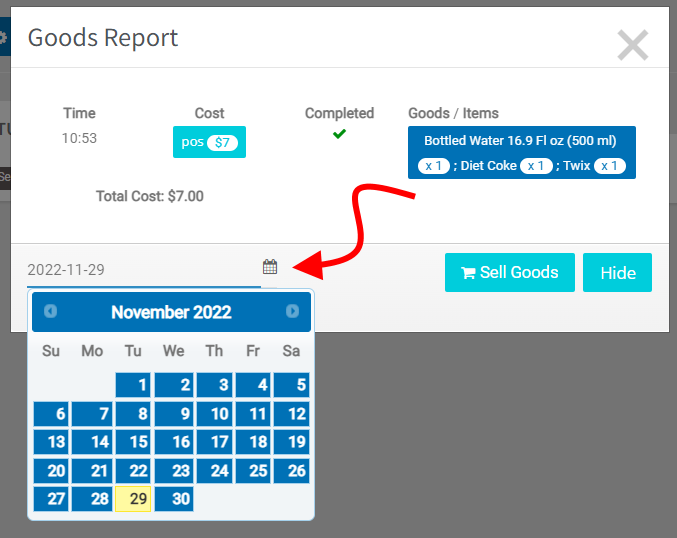
When Goods are paid with cash this will also reflect on your Cash report. All Goods payments are also included in your Financial Reports
For additional information, please do not hesitate to reach out to us any time need at info@synthesisvr.com