How Can We Help?
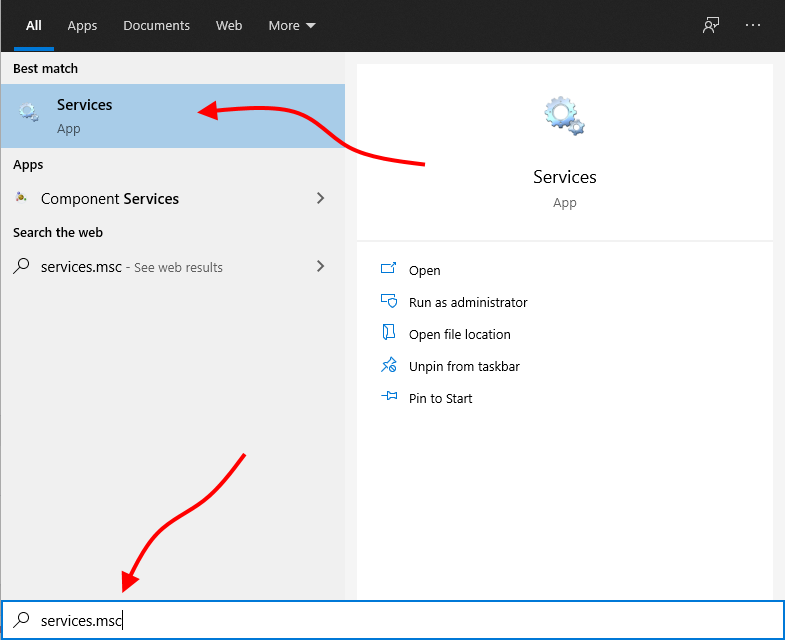
On your original Proxy/Server, open the Start menu and type in “services.msc” (without the quotes) and click on the Services App when it comes up:
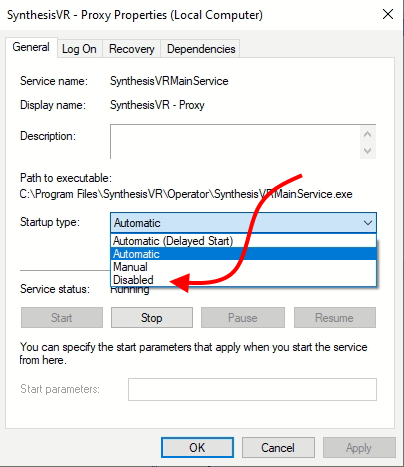
Scroll down until you see the SynthesisVR Proxy and double click on it or right click and choose “Properties”:

In the middle of the window there will be a drop down menu that is set to Automatic. Click on that and then choose Disabled.
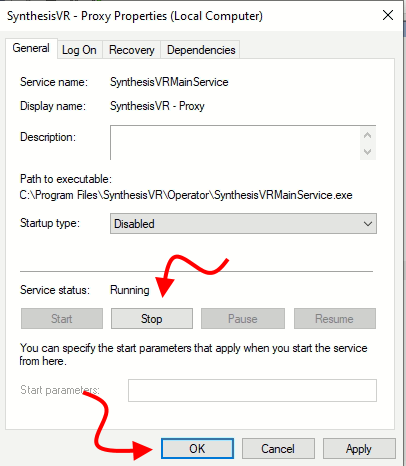
Click on Stop and then click on OK
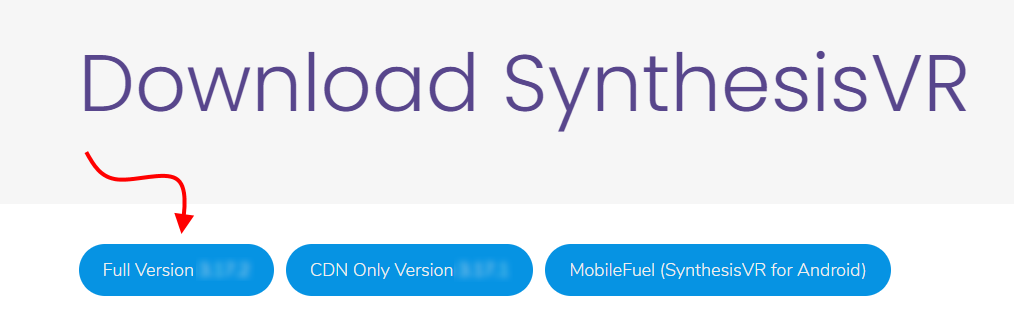
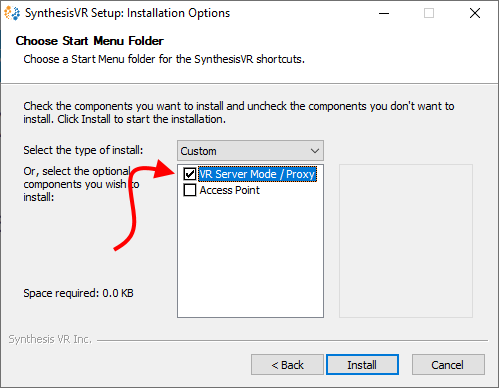
On the new computer, download the latest SynthesisVR Installer from https://synthesisvr.com/download and be sure to download the Full Version:
Install in the new location, being sure to select the VR Server Proxy option when installing.
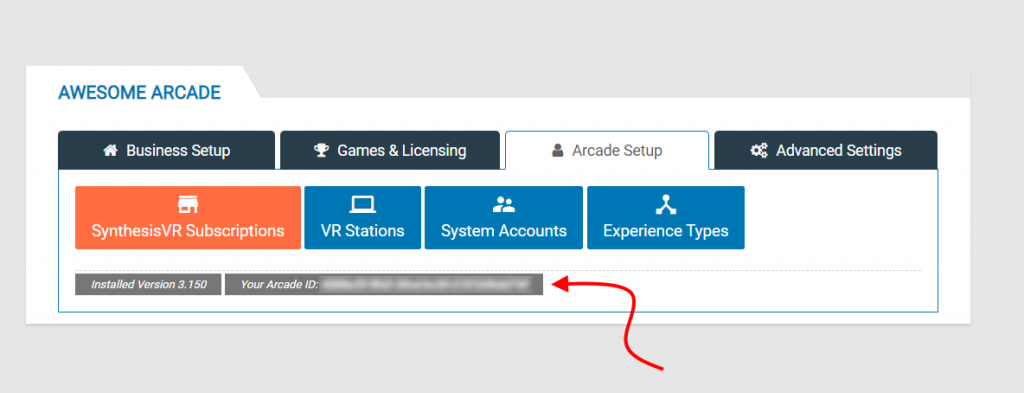
If prompted for an Arcade ID (generally if on a new unrecognized network), you can find the ID in your SynthesisVR Dashboard in the Arcade Setup section (only via the Advanced view):
Once installed it is recommended that you end the SynthesisVR Access Point apps running on all the stations to have them restart (or restart manually after ending the task) so that once they launch the are able to identify and connect to the new installation.