How Can We Help?
PART 1 – Setup capturing directory
Setup the “Video Capture Storage Path” option of your arcade:
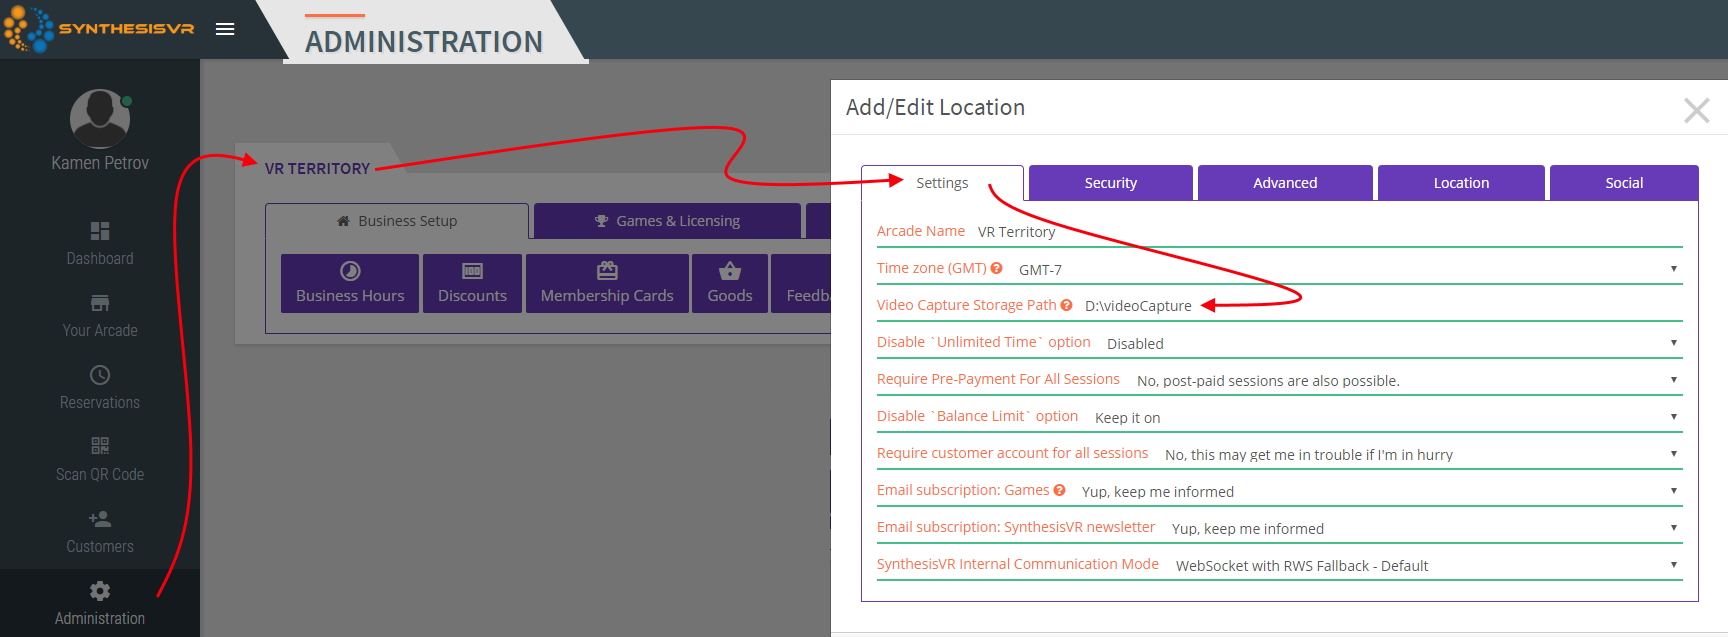
Important: “D:\videoCapture” must be an existing directory on the PC running your Proxy.
Once you change the setting, please restart your “SynthesisVR – Proxy” (similarly to the next image).
PART 2 – SETUP OBS
1. Install OBS Studio (https://obsproject.com/download)
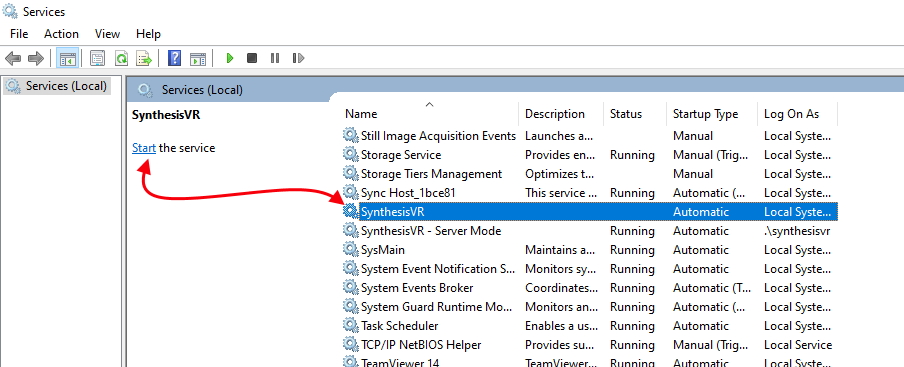
2. While OBS Studio is running, restart Synthesis via the Windows Services:
3. Wait for 30 seconds and restart OBS. After that, you’ll have the OpenVR source:
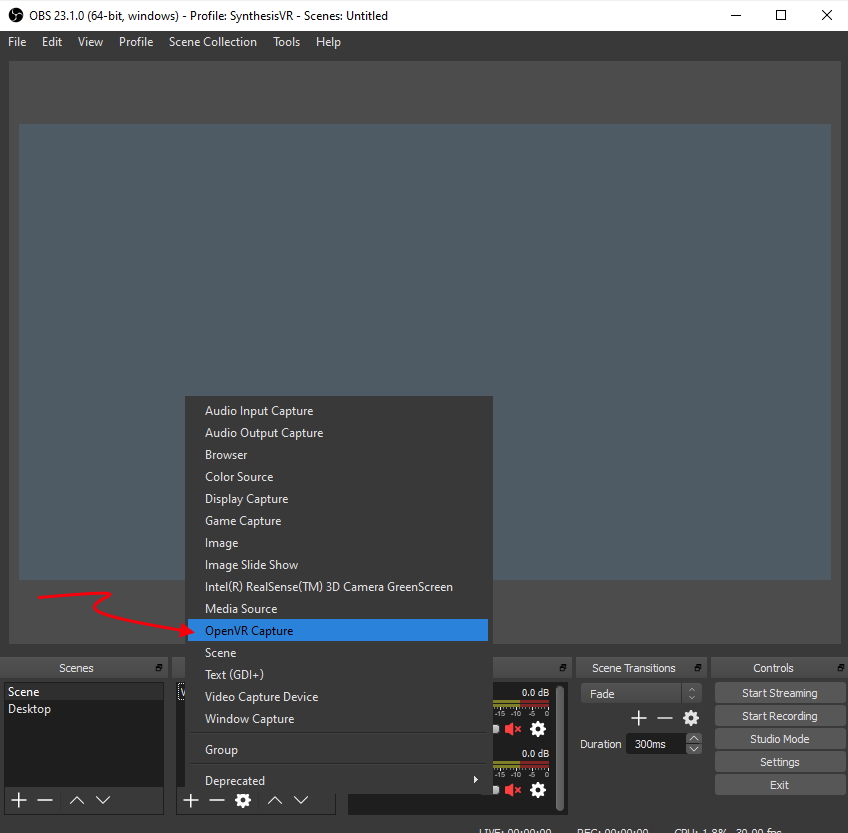
Add “OpenVR Capture” to your scene.
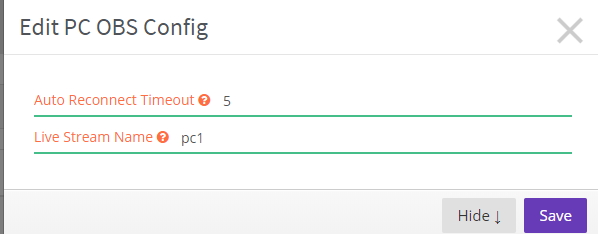
4. Under the SynthesisVR web administration portal, go to “Administration >> VR Stations” and click on the “OBS Config” button.
Set the auto reconnect timeout to 5 and also set the “Live Stream Name” option. The name should contain no spaces or special characters and must be unique for each of your stations.
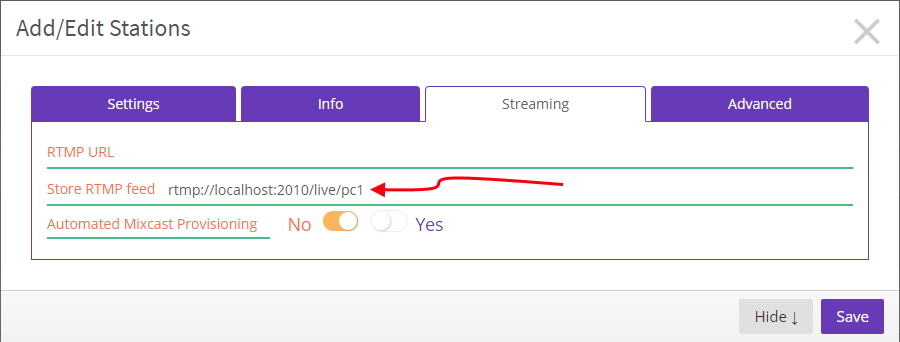
5. Click on the “Edit” button for the station you are setting up. In the new popup, switch to the “Streaming” tab.
Set the “Store RTMP feed” to:
- rtmp://localhost:2010/live/pc1
where pc1 is the “Live Stream Name” you configured during the previous step.
Note, in 99% of the cases, the “rtmp://localhost:2010/live/” part of the RTMP feed have to remain the same.
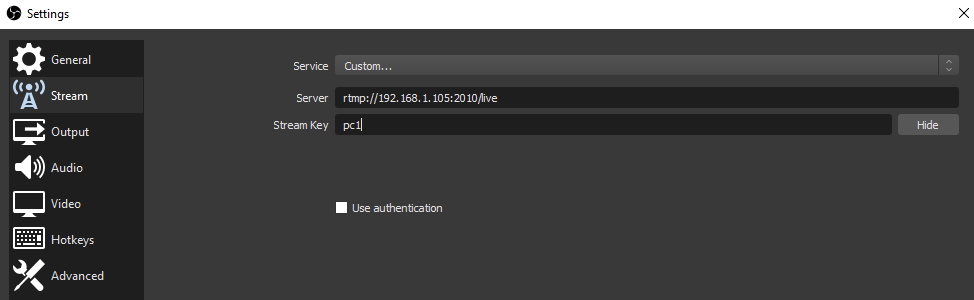
6. In OBS, click on the “Settings” button and switch to the “Stream” options.
Set the “Server” option to:
- rtmp://<IP>:2010/live
<IP> have to be replaced with the IP of the PC running the “VR Server Mode”. Also, if you don’t use static IPs, you can set it up with the name of the PC. Example:
- rtmp://Operator:2010/live
Set the “Stream Key” to the same value you configured under Synthesis as “Live Stream Name”.
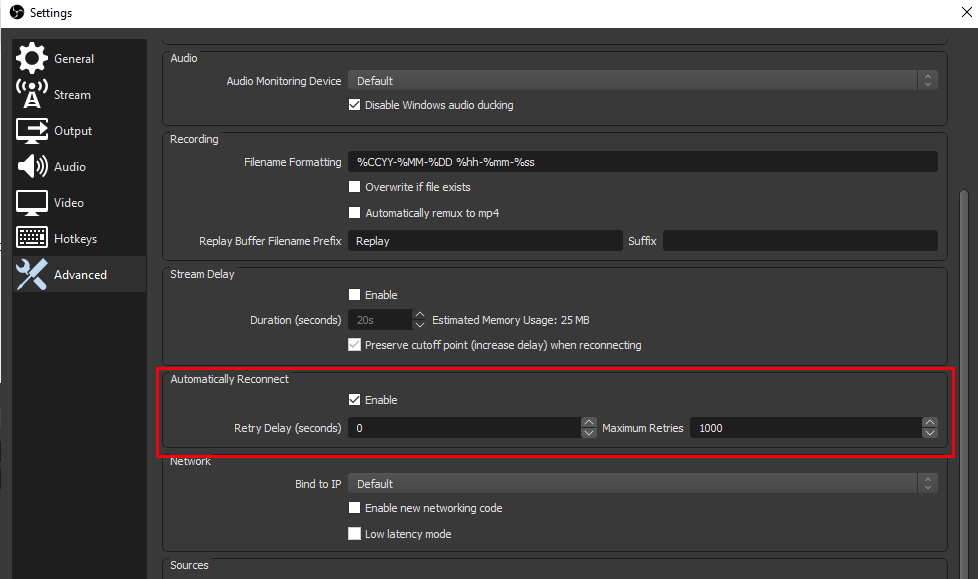
7. You can google for “optimized OBS streaming settings”. Under “Output”, you can play with the Streaming settings to get maximum performance. You may also want to touch the “Video > output” settings. We’ll advise keeping the FPS setting to around 29.97 or 30.
Under “Advanced”, enable the “Automatic Reconnect” option:
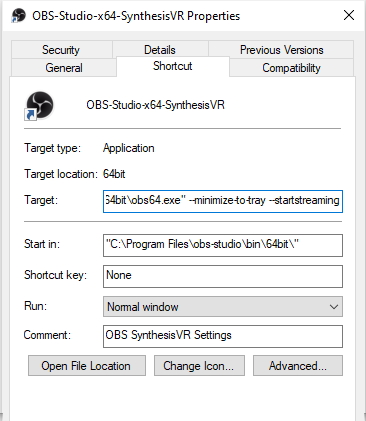
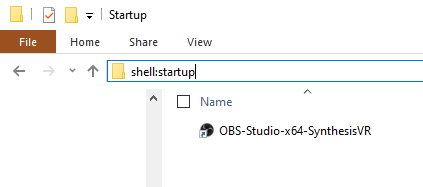
8. To have OBS Studio start automatically with Windows, add a shortcut to shell:startup
Add arguments to the shortcut:
- –minimize-to-tray
- –startstreaming
Example shortcut “Target” line:
- “C:\Program Files\obs-studio\bin\64bit\obs64.exe” –minimize-to-tray –startstreaming