How Can We Help?
Before you can schedule or start a session, you’ll need to assign Experience types to your PC Stations using the following steps.
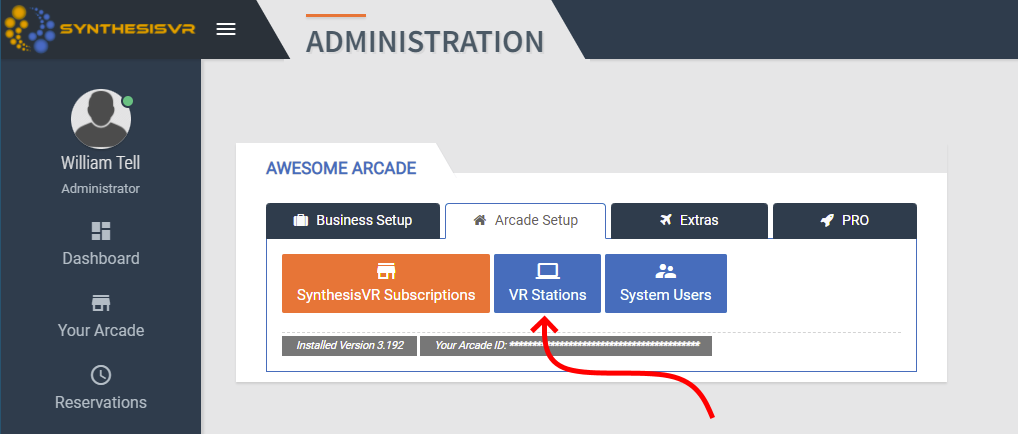
- From the Administration menu, Arcade Setup (tab) and then click on the “VR Stations” button.
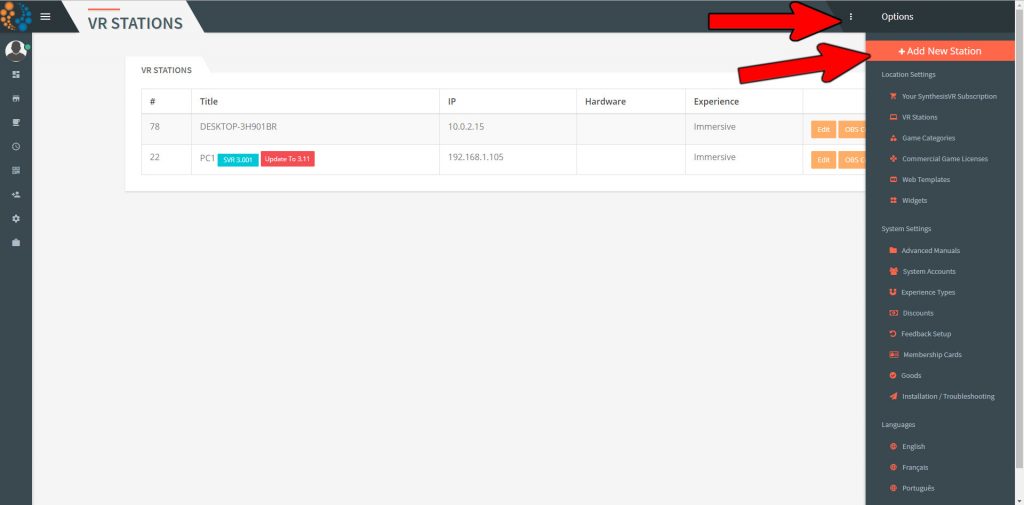
- Click on the 3 dots in the top right which will bring up your Option menu and then click on the “Add New Station” button.
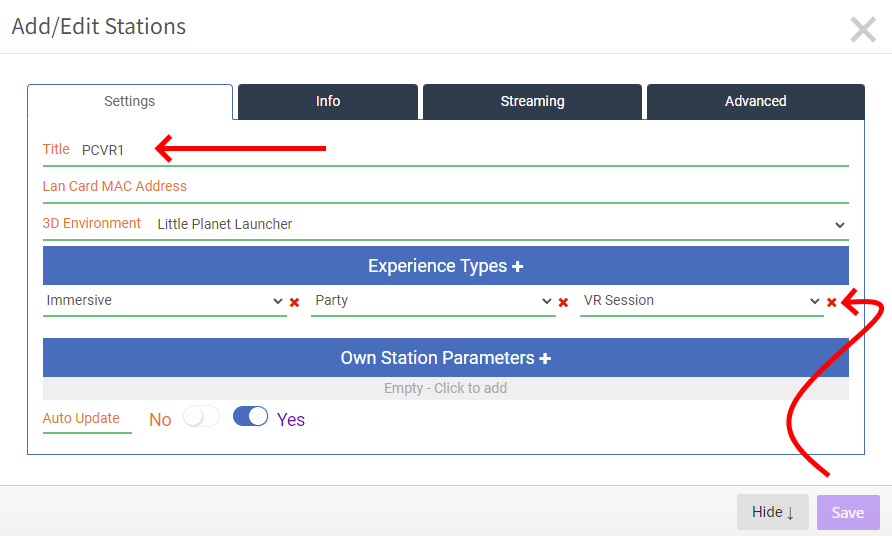
- Enter in the Station Name in the “Title” section (best practice is to number your stations for easy identification). Enter in an arbitrary number into the “IP” section (again, best practice and to keep things consistent, use a numerical value to help identify the station).
- You’ll need to have one Experience Type(s) selected, so click on the “Experience Types +” button. You’ll need to choose the Experience Type from the drop down menu.
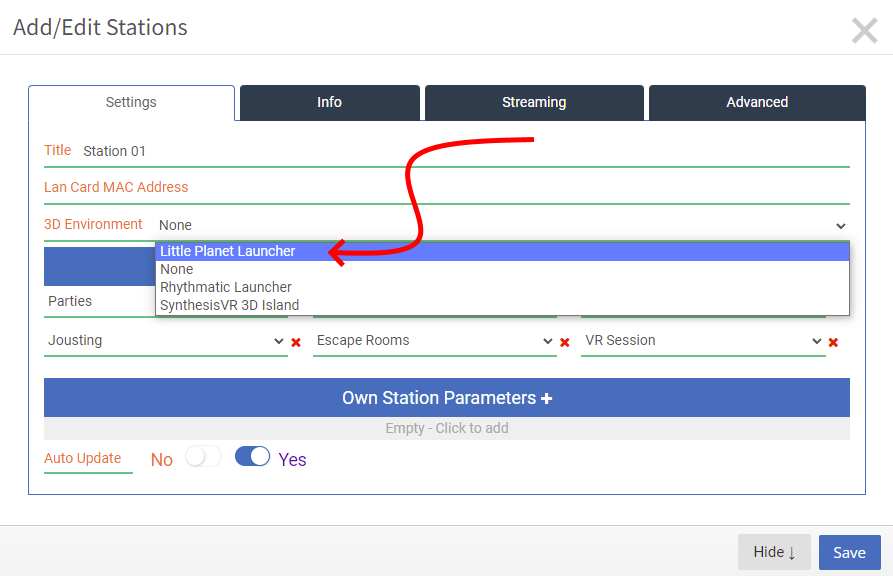
6. If you’d like to use the 3D Environment, click the drop down menu in the “3D Environment” drop down menu and choose the “Little Planet Launcher” option (for example).
You will need to do a refresh on the VR Station(s) that you’ll be using the 3D environment in. If you choose to revert back to the standard 2D menu, you can switch this back to “None” at any time and you’ll again need to do a refresh on the VR Station(s) that you’re reverting back.
7. Once you’ve entered in all the necessary (and optional) sections, you will see that the “Save” button is now solid and clickable. Click that to save, otherwise your edits will be lost. If you want to exit and start over click the tiny “x” button in the top right of the window or click the “Hide” button at the bottom of the window.