How Can We Help?
Introduction
Synthesis VR is a software platform for location-based virtual reality device management and content licensing. Our platform achieves this goal with a “Synthesis” of multiple pieces of software. The heart of Synthesis VR software platform is the Synthesis VR Proxy.
What Is The Synthesis VR Proxy?
The Synthesis VR Proxy is a communication and cache interface between the Synthesis VR management applications such as:
- The Synthesis VR Web Terminal: https://my.synthesisvr.com
- The Local Manager Desktop Application
- Your VR Gaming Computers
- Your Standalone Android-Based VR Headsets (Meta Quest, HTC Focus 3, PICO)
- Module & Add-Ons, such as a Dedicated Multiplayer Game Server, or the Synthesis VR Leaderboard
How Does The Synthesis VR Proxy Work?
Every Synthesis VR customer is assigned a personal and private AES key (Advanced Encryption Standard) and the communication between the Synthesis VR infrastructure and your Synthesis VR Proxy instance is encrypted with the same key. This ensures your network, despite being connected to the Synthesis infrastructure, is completely isolated.
What Does The Synthesis VR Proxy Look Like?
The Proxy does not have a GUI (Graphic User Interface), and does not have a “window” to launch or interact with. It is a Windows Service that runs in the background. Therefore, it is lightweight and doesn’t require a powerful system to run.
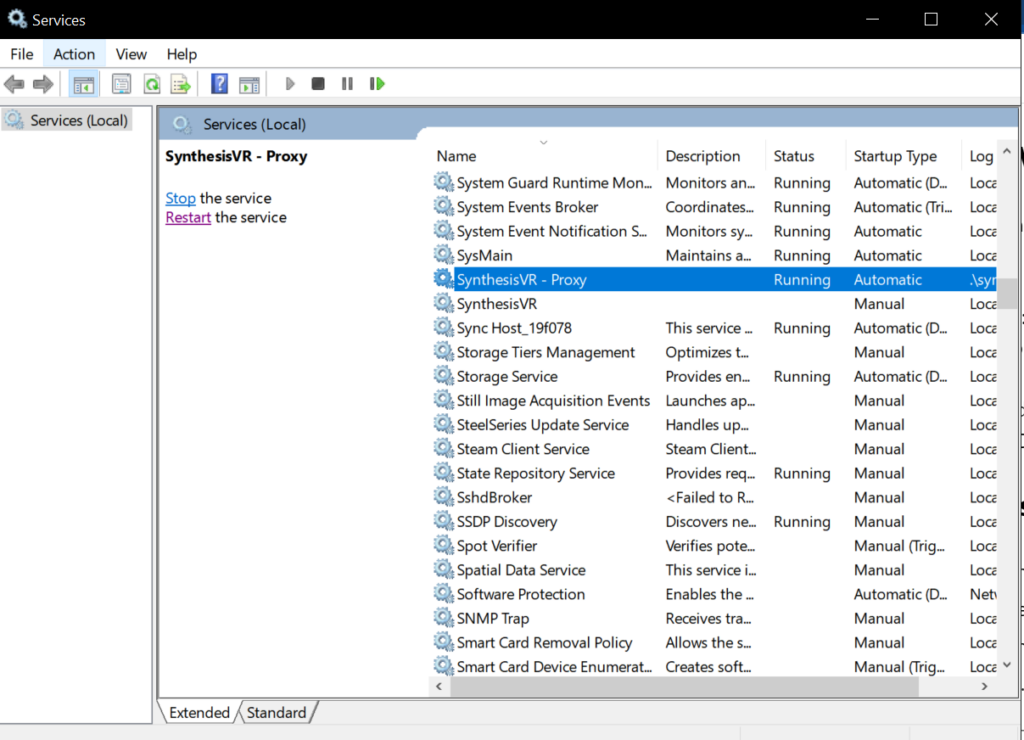
You can find it by going to the Windows Services Manager.
- Method 1: Press Windows Key + R, and type “services.msc“
- Method 2: Type “services” in the search bar
The Synthesis VR Proxy can be found here. It is started automatically when the computer is turned on. You can start, stop, or restart the service from the windows services manager.
If the Synthesis VR Proxy is stopped, the communication won’t work and you won’t be able to manage your VR devices (manage sessions ; use Voice Chat ; etc). Synthesis VR will not function.

The “synthesisvr” Windows Account
Upon installing the Proxy, a new synthesisvr Windows Administrator account is created and a random 16 characters password is assigned. The account and the password are used to allow the Proxy service to run on the PC even if all the other Windows users are currently not logged in and interacting with the Desktop.
There is no need to ever log in with this user.
Where Do I Install The Synthesis VR Proxy?
Important Notes
- The proxy can be installed on any windows computer.
- The proxy is typically installed on the chosen “master computer”
- This computer must be on the same network as your VR devices and other computers.
- Only install the proxy ONCE. Only 1 proxy per location, no more, no less
On Which Computer Do I Install The Synthesis VR Proxy?
The Proxy is typically installed on a computer matching one of these descriptions:
- The primary operator computer
- A chosen “master computer”
- Dedicated Game Server computer
- One of the VR stations
*In specific use cases like Enterprise setups or mobile events, the Proxy can be installed on Cloud infrastructure.
Installation: SynthesisVR Proxy
Step 1: Requirements
- A Synthesis VR Account
Step 2: Obtain your Arcade Unique Identifier code
An Arcade Unique Identifier code is required to install the Synthesis VR Proxy. Follow these instructions to obtain it
- Login to the Synthesis VR Web Terminal: https://my.synthesisvr.com
- Navigate to the Administration Page

- Click the “Click to copy your Arcade ID” button
Step 3: Download the Synthesis VR Installer
Step 4: Open The Installer
Step 5: Choose the Install Location
- This should not need to be changed
- Click “Next”

Step 6: Choose the Start Menu Folder
- This should not need to be changed
- Click “Next”

Step 7: IMPORTANT – Select Synthesis VR Proxy, Unselect Access Point
Access Point is selected by default. You must unselect it, and select “SynthesisVR Proxy”

Step 8: Enter Your Arcade Unique Identifier
- Enter your Arcade Unique Identifier
- Select “Authorize”, this will start the installation

Step 9: Close the Installer
- When your download is finished, the “Close” button will become availiable to be pressed.
- Click “Close”

